RelayPay
Cryptocurrency payments, bills, and transfers across mobile and web.
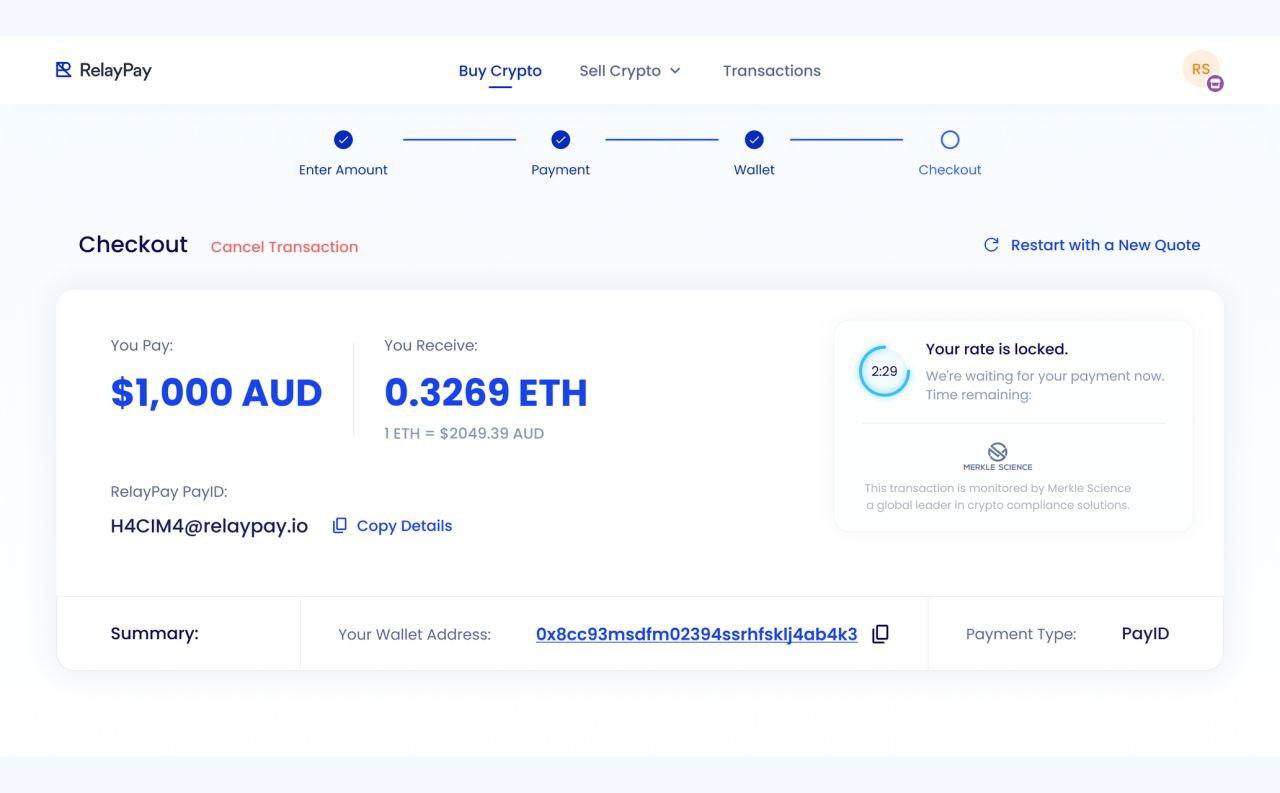
RelayPay brings cryptocurrency payments, bills, and transfers into mobile and web interfaces. The design covers account setup, guided onboarding, payment creation, transaction history, and merchant checkout.
A mobile starting point
RelayPay connects cryptocurrency payments with everyday bills and transfers. The mobile design begins with a clear entry point and a step-by-step account setup flow.
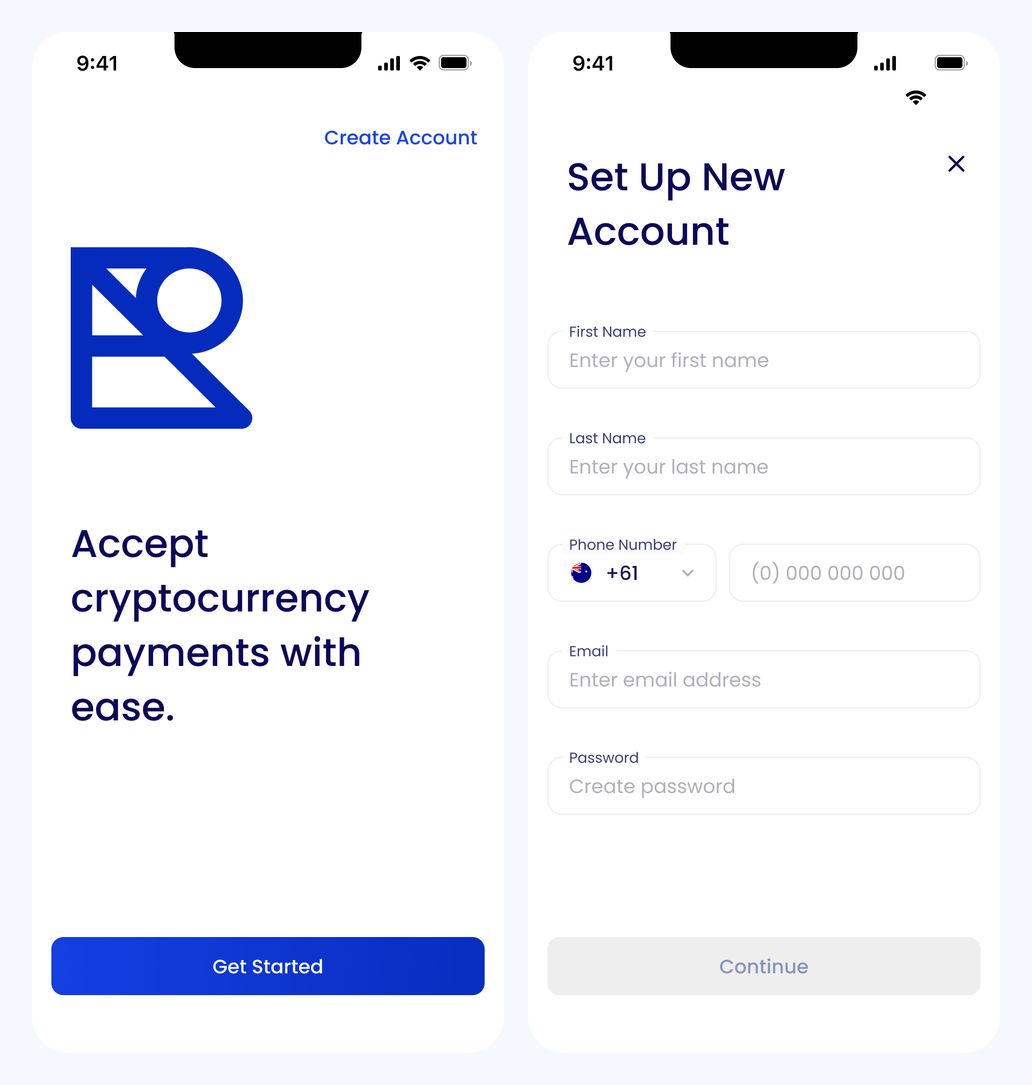
Welcome and personal account setup
Personal details
Contact fields stay together, while a dedicated country-code selector makes the phone-number choice explicit.
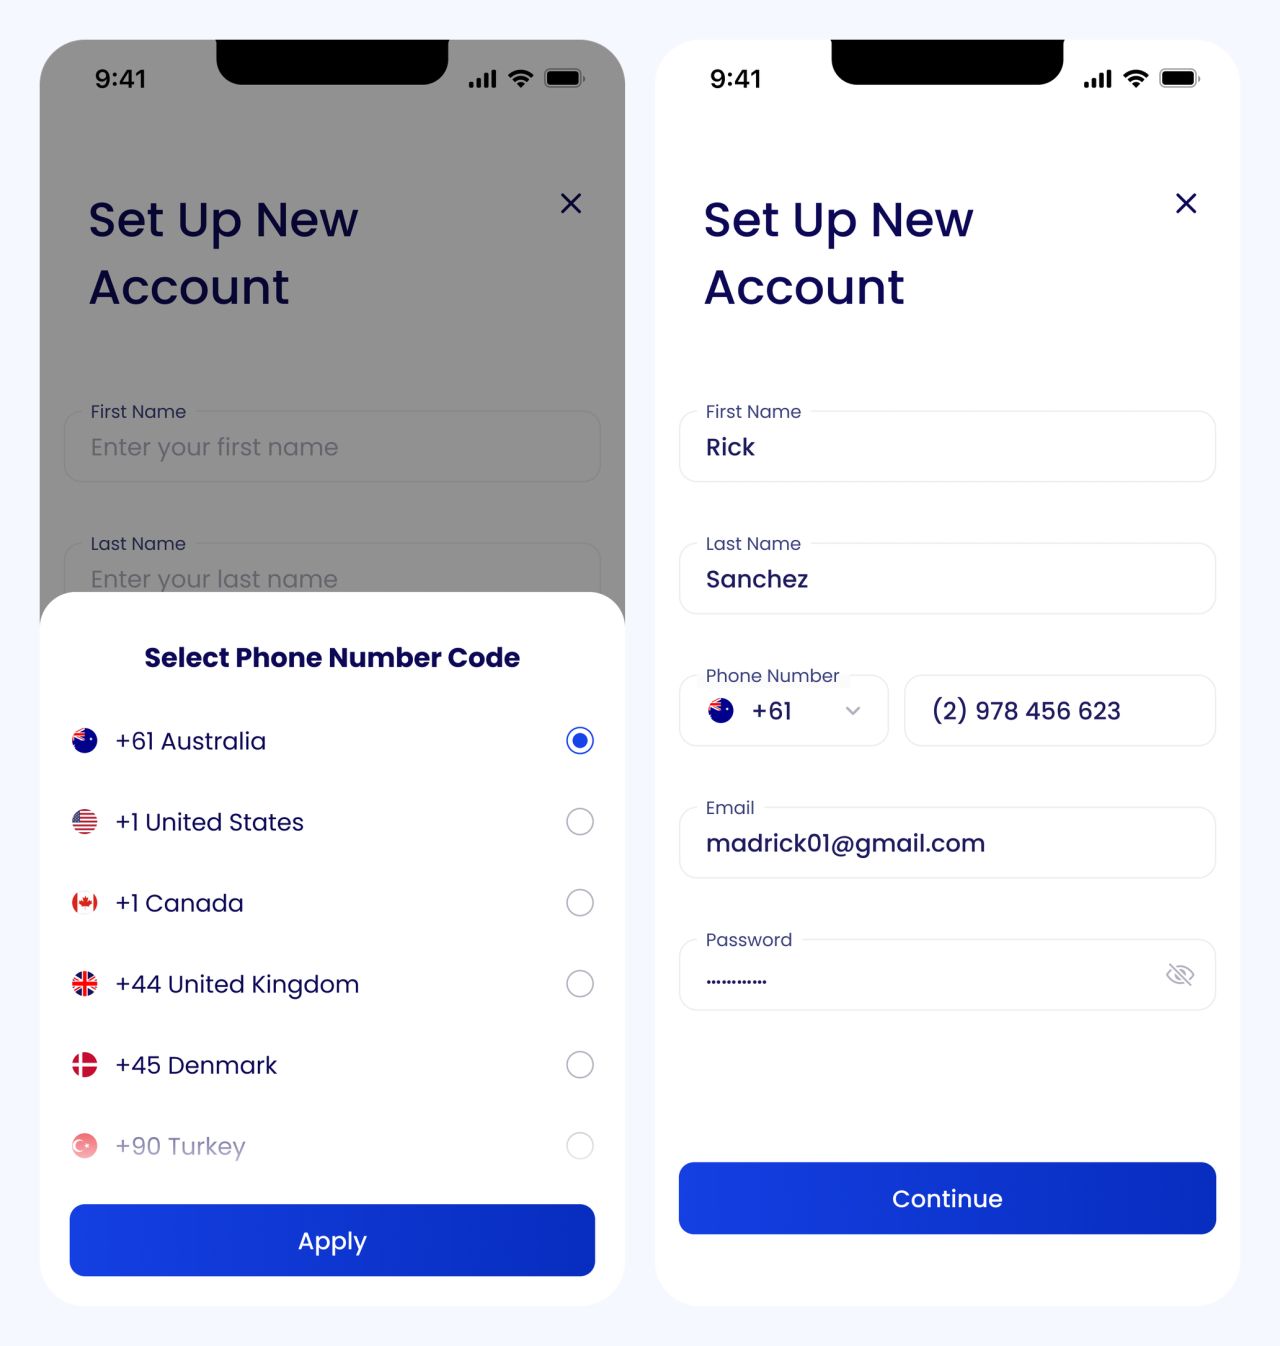
Country-code selection and completed personal details
Business account setup
The business flow adds company details and a preferred settlement currency before the account is created.
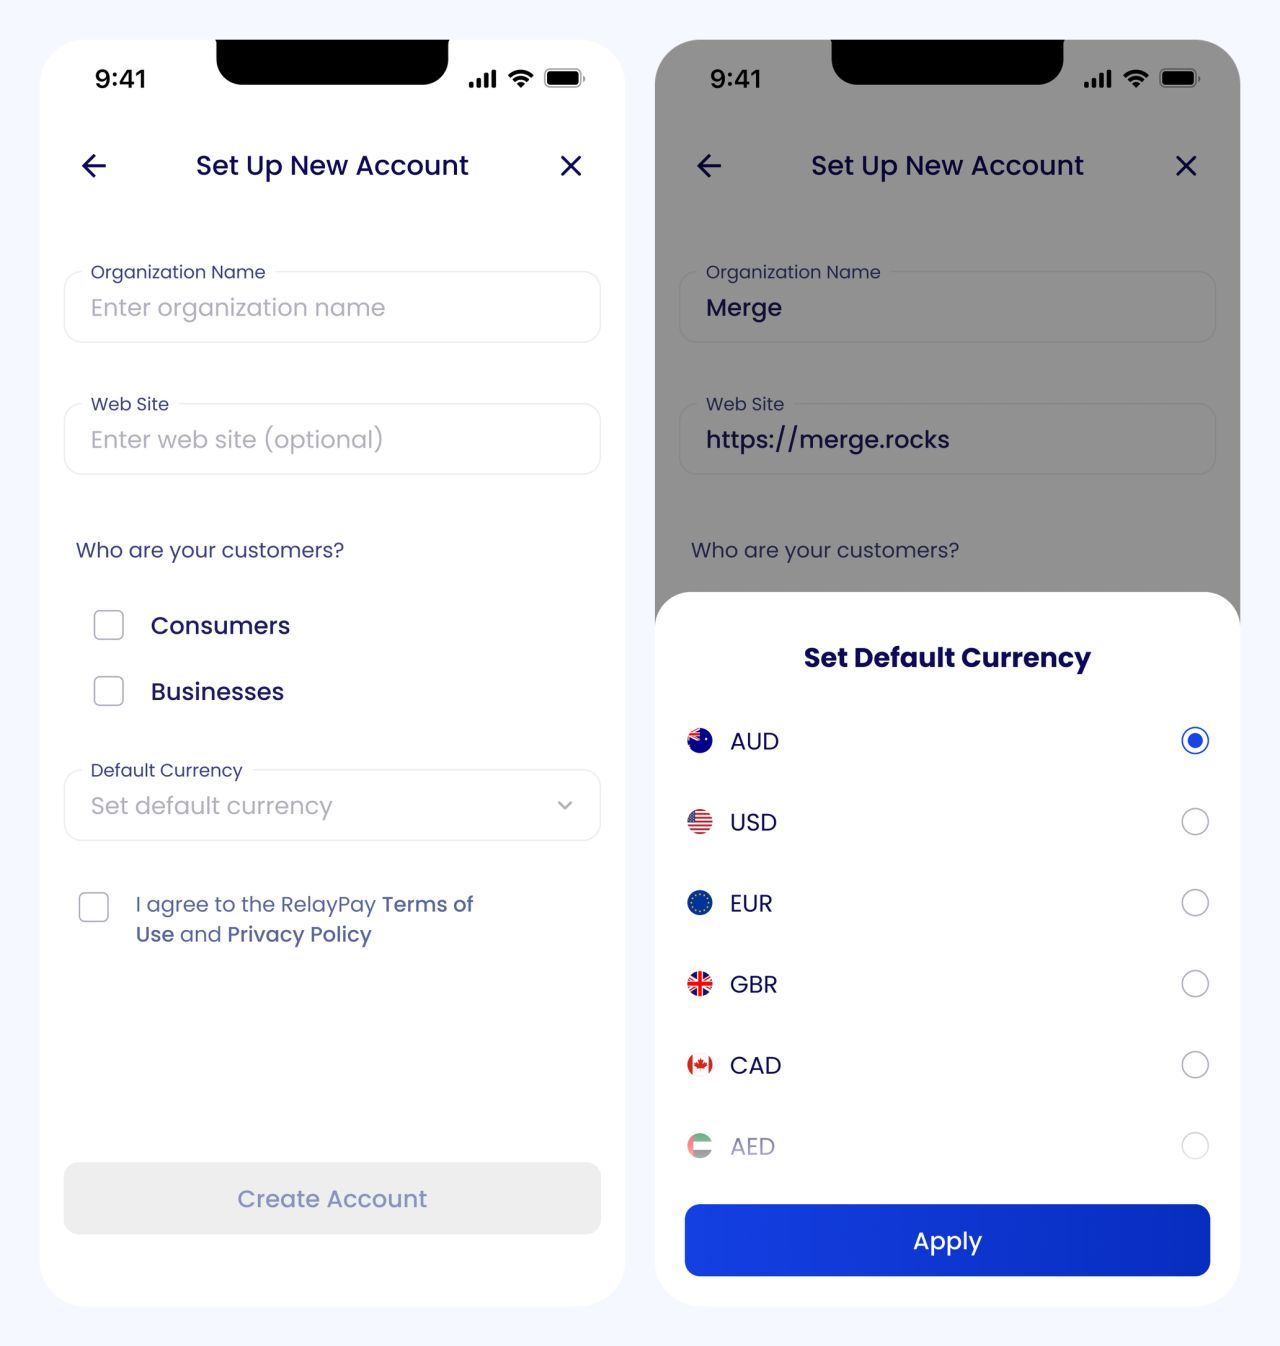
Business details and currency selection
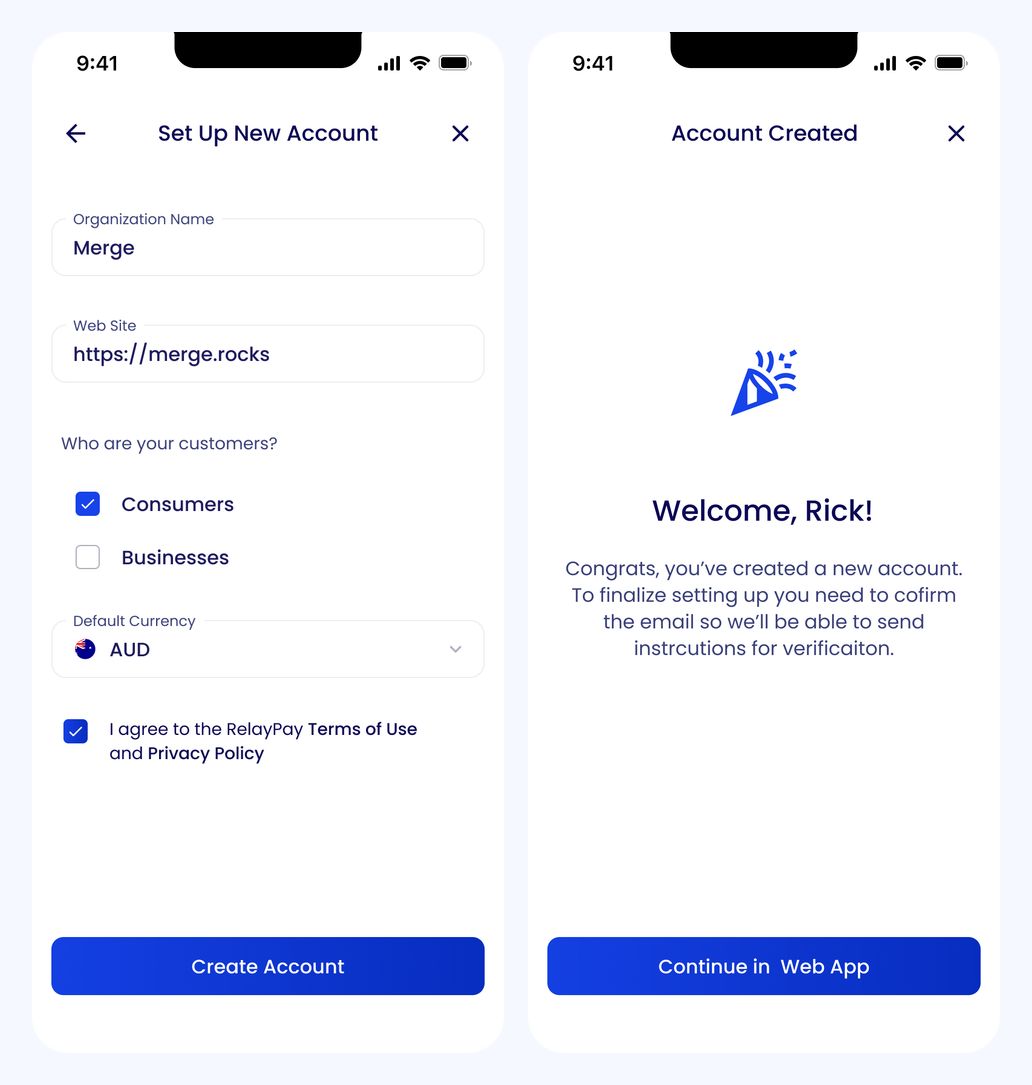
Completed business form and account confirmation
An introduction to the essentials
Three introductory cards explain accepting payments, creating invoices, and exploring transactions before the user enters the workspace.
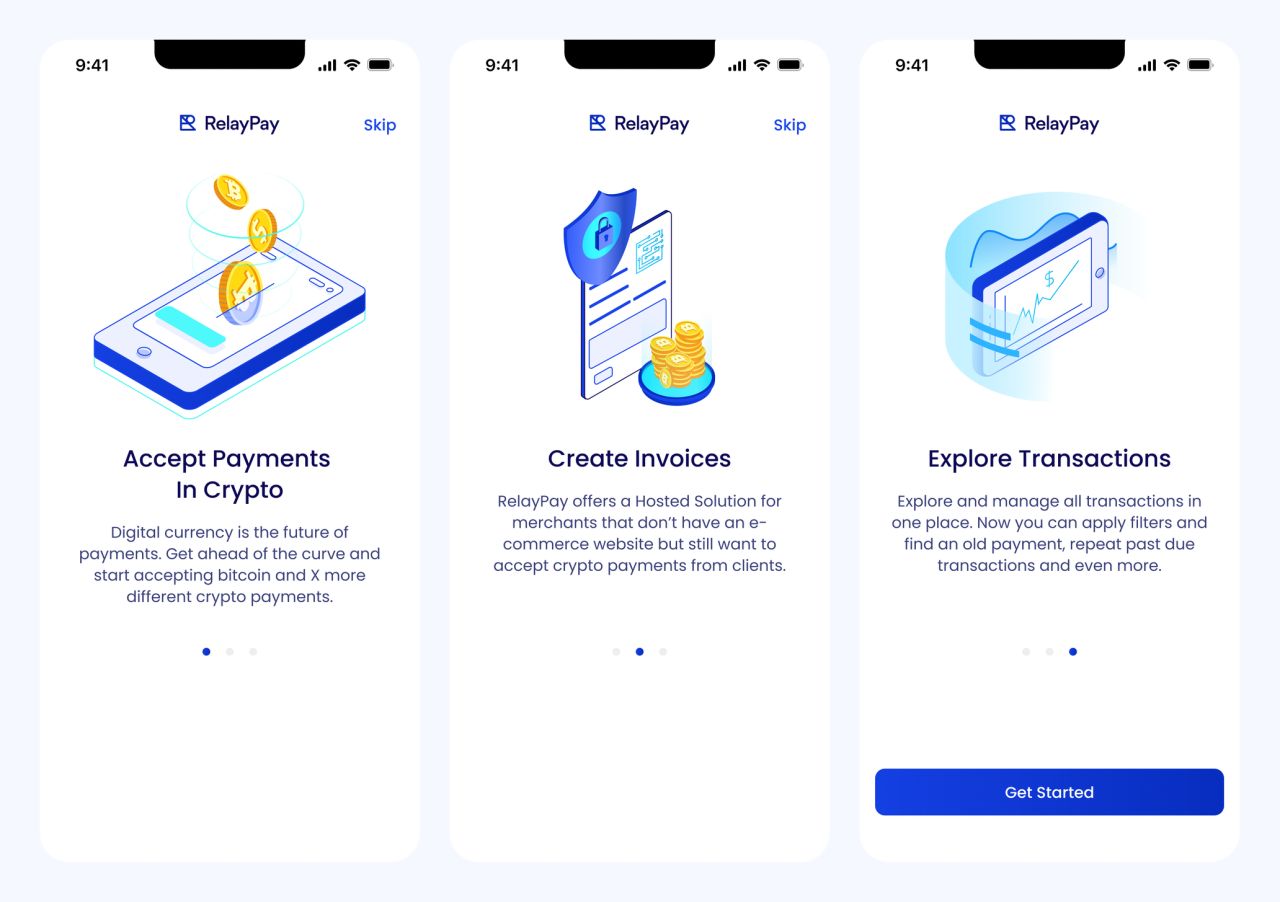
Introductory cards: payments, invoices, and transactions
Guidance in context
A short product tour points to the overview, transaction history, and payment action directly within the interface.
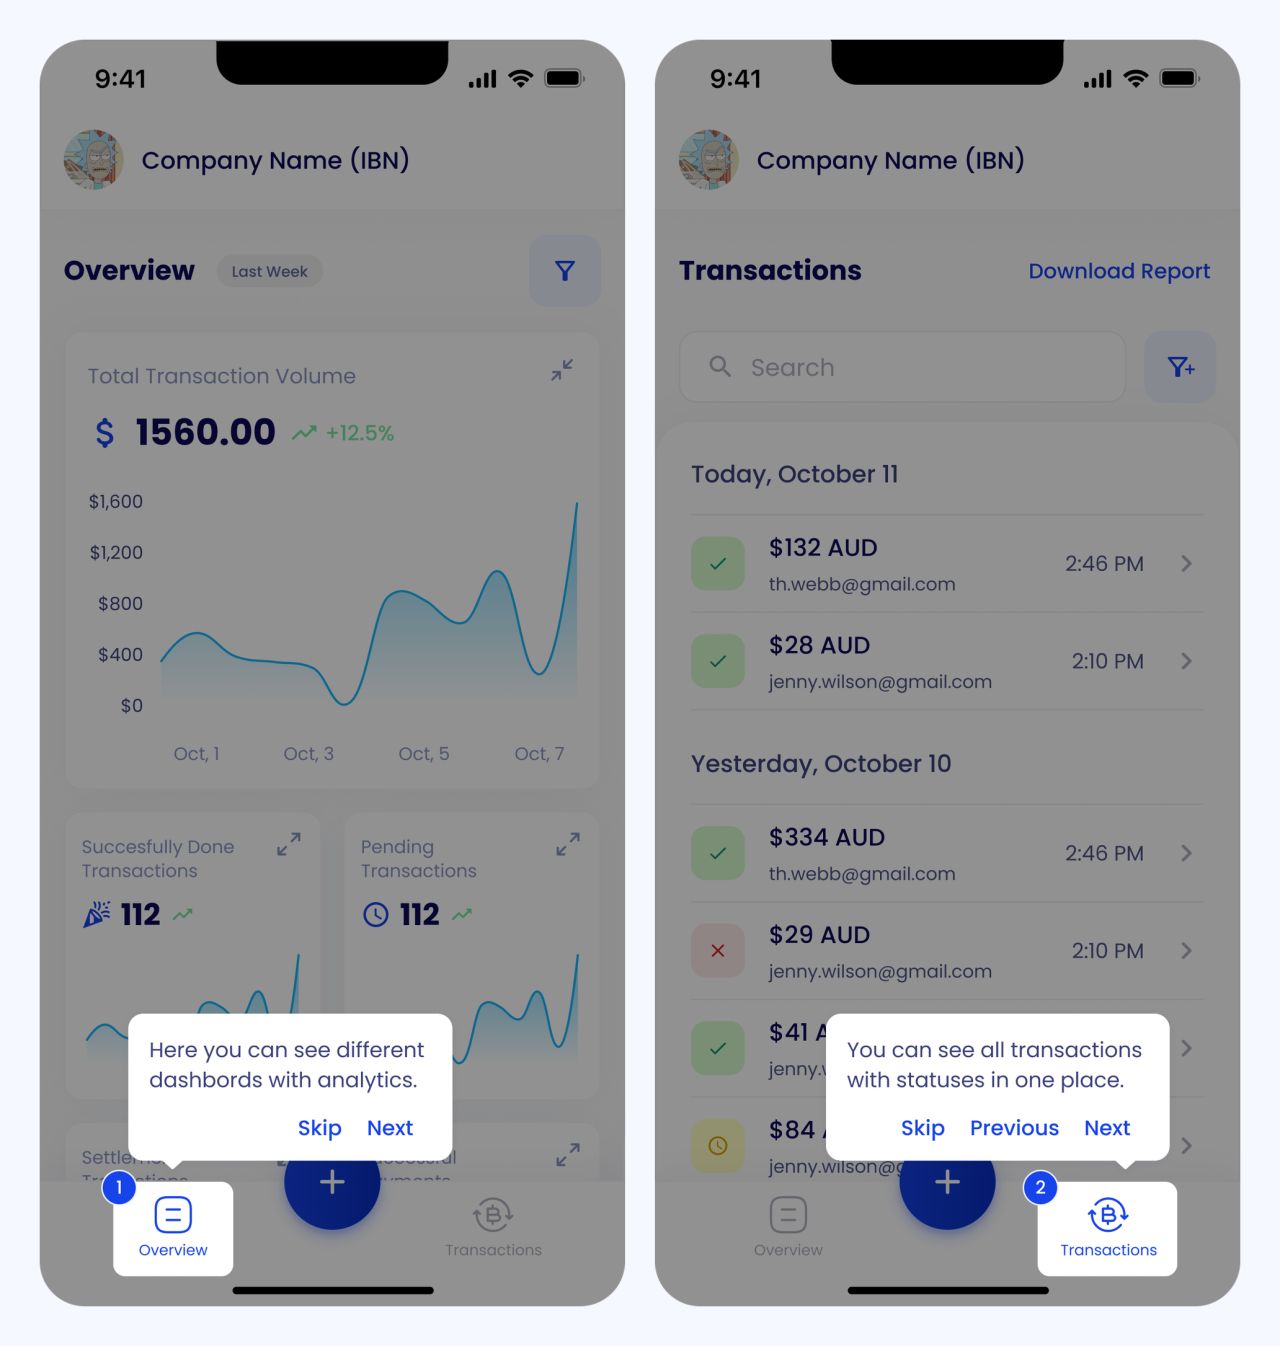
In-app guidance for overview and transactions
From guidance to the workspace
The final tour step highlights the payment action, followed by the default overview with its volume chart and summary metrics.
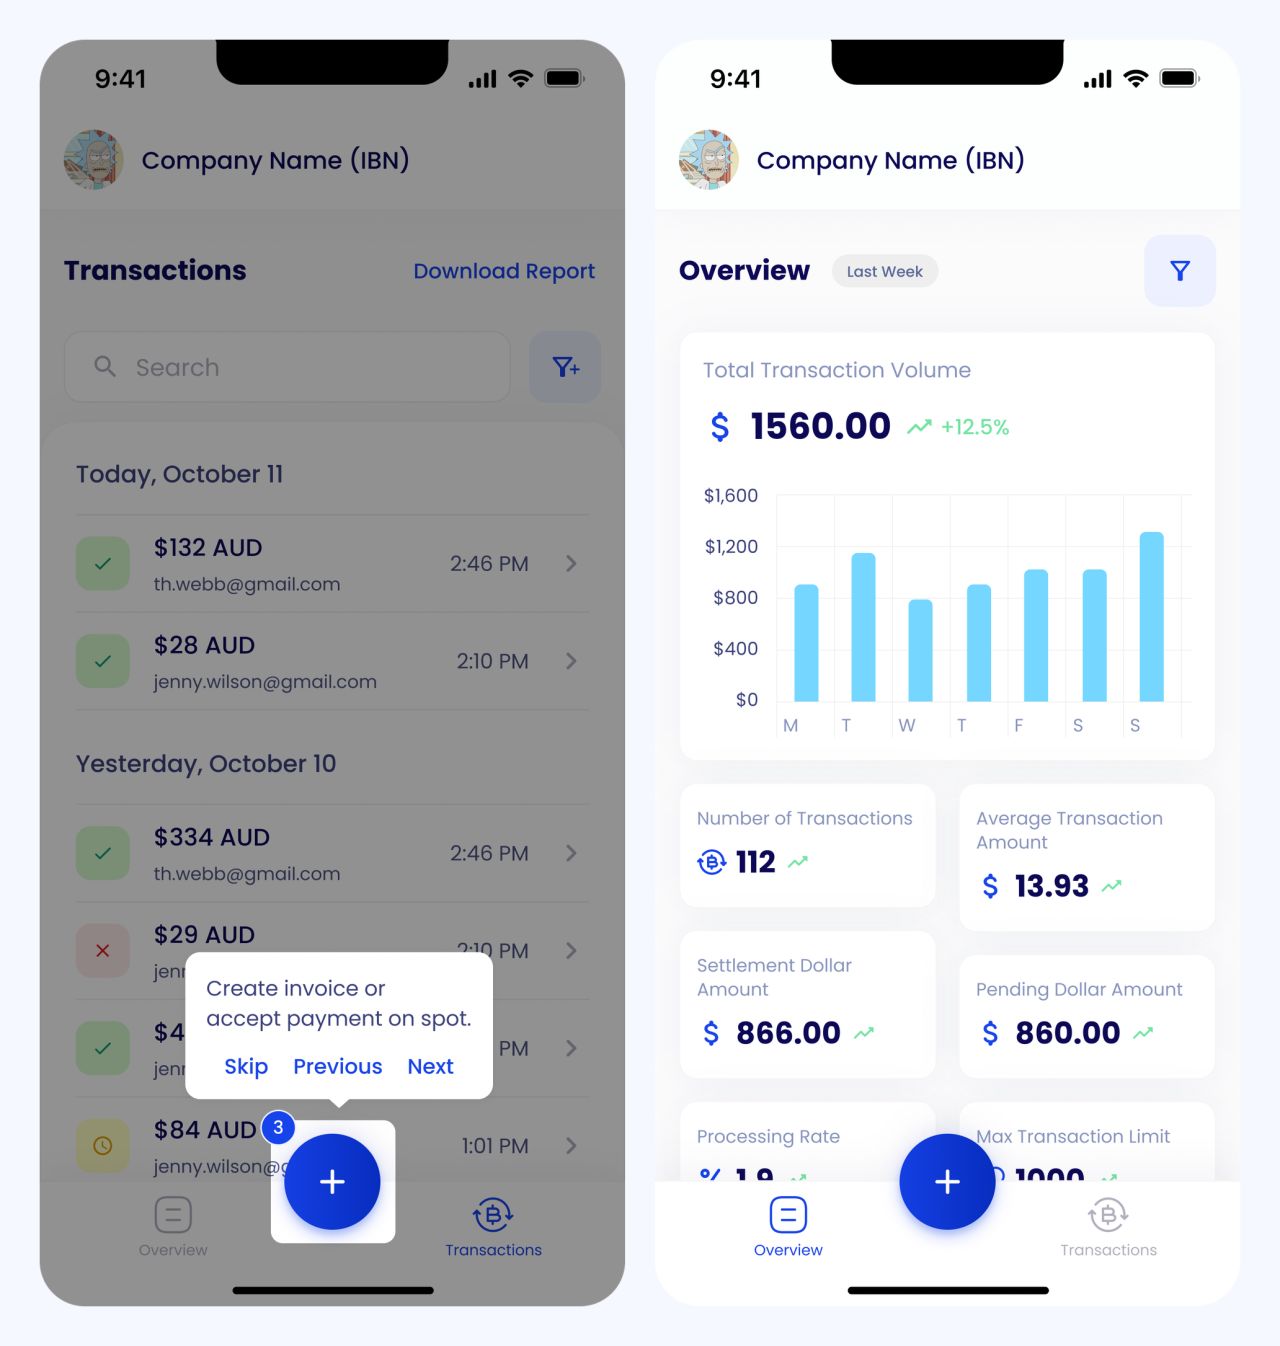
Payment-action guidance and default mobile overview
Activity at a glance
The overview brings payment totals, volume, and recent transactions into one mobile workspace. A date-range control provides another view of the activity.
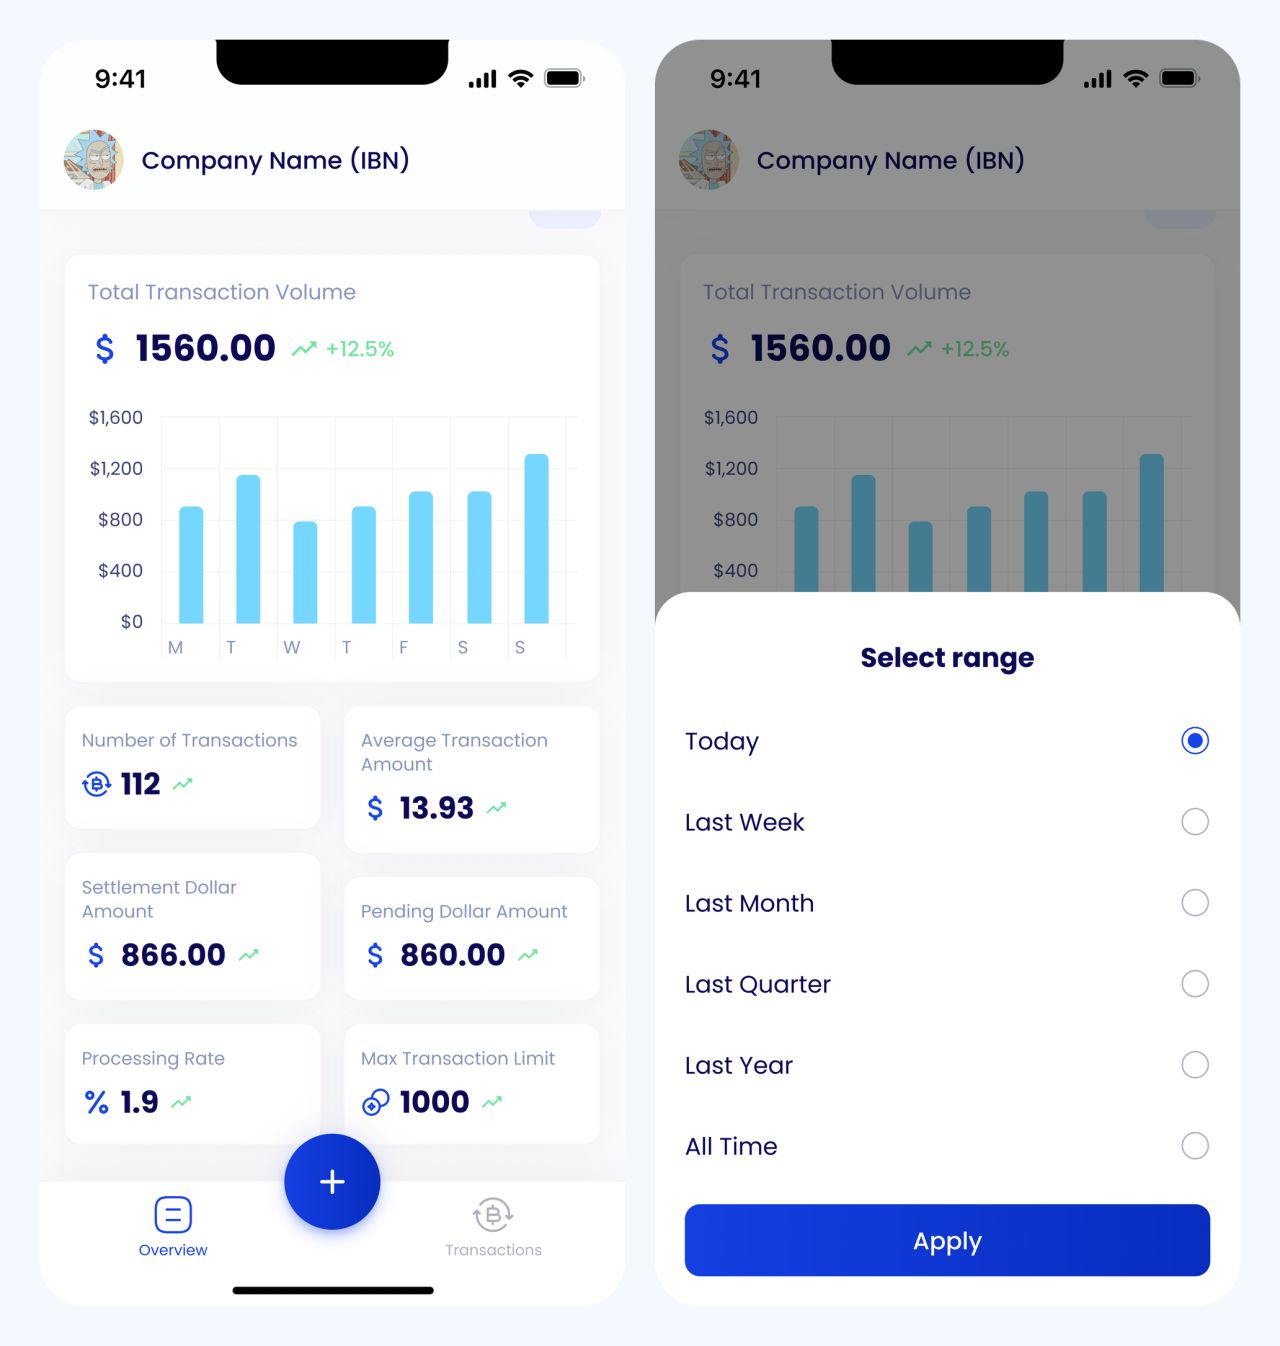
Scrolled overview and date-range filter
From a list to a transaction
Transaction history pairs recognizable status labels with a detail screen for the selected payment.
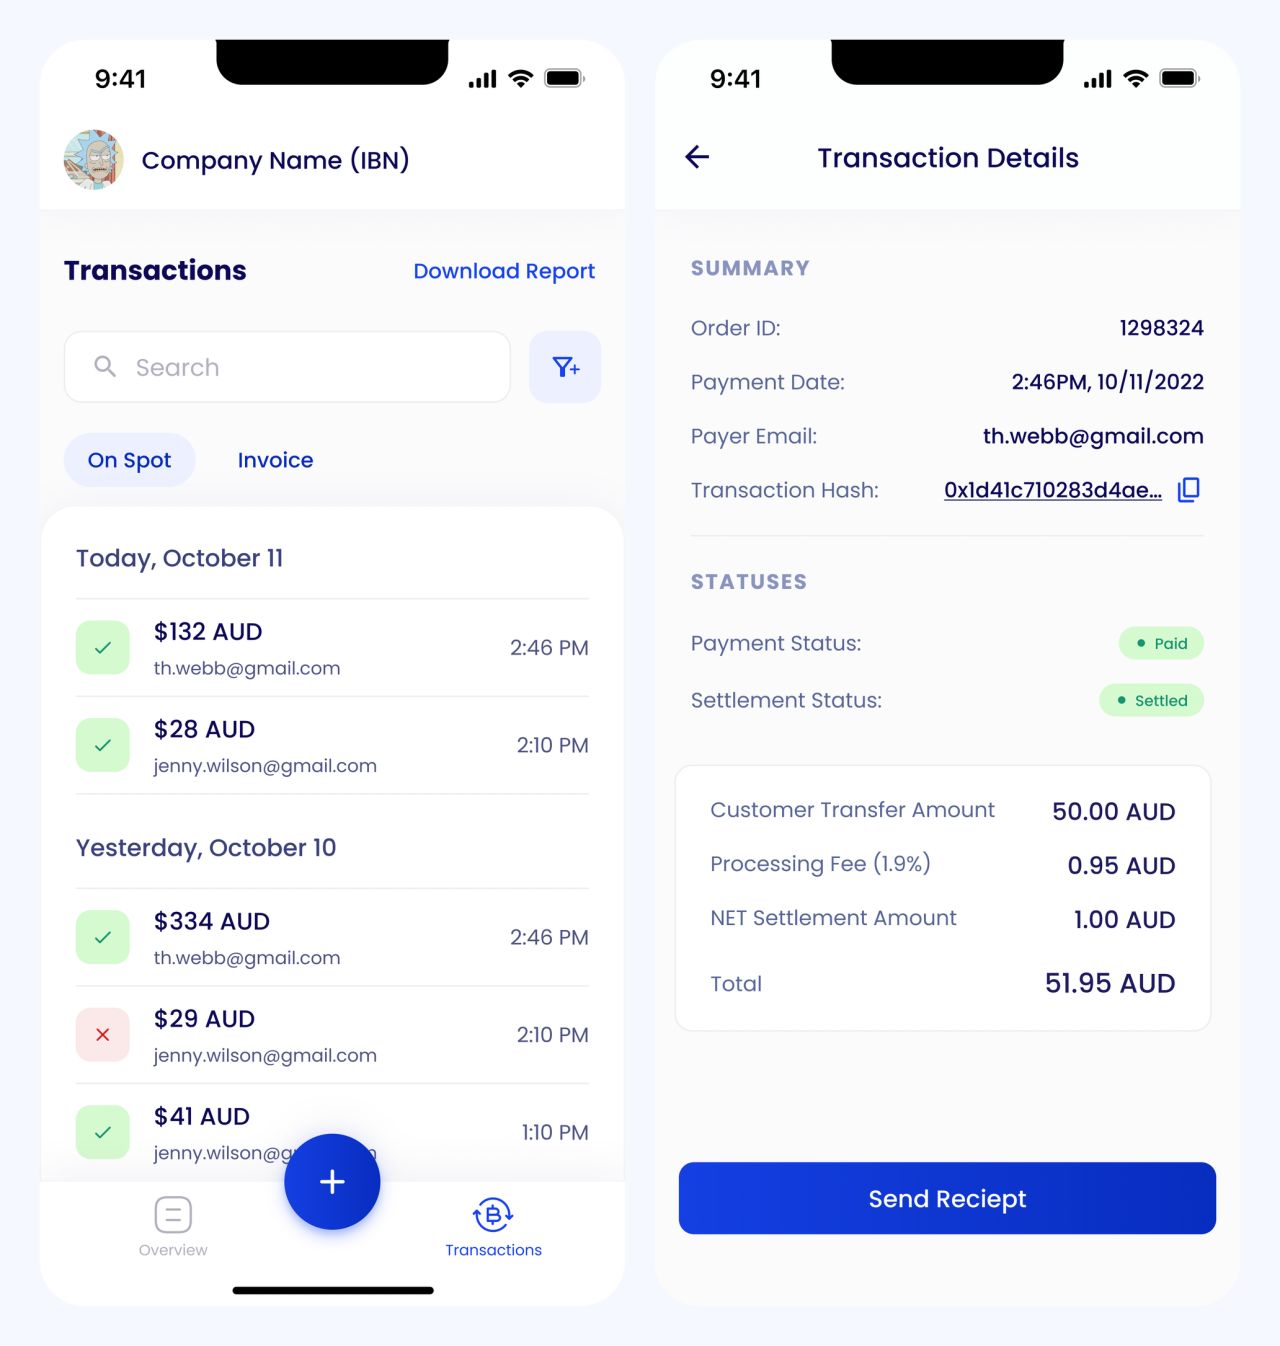
Transaction list and payment details
Narrowing the history
Filter controls expose payment attributes and an amount range without replacing the transaction context.
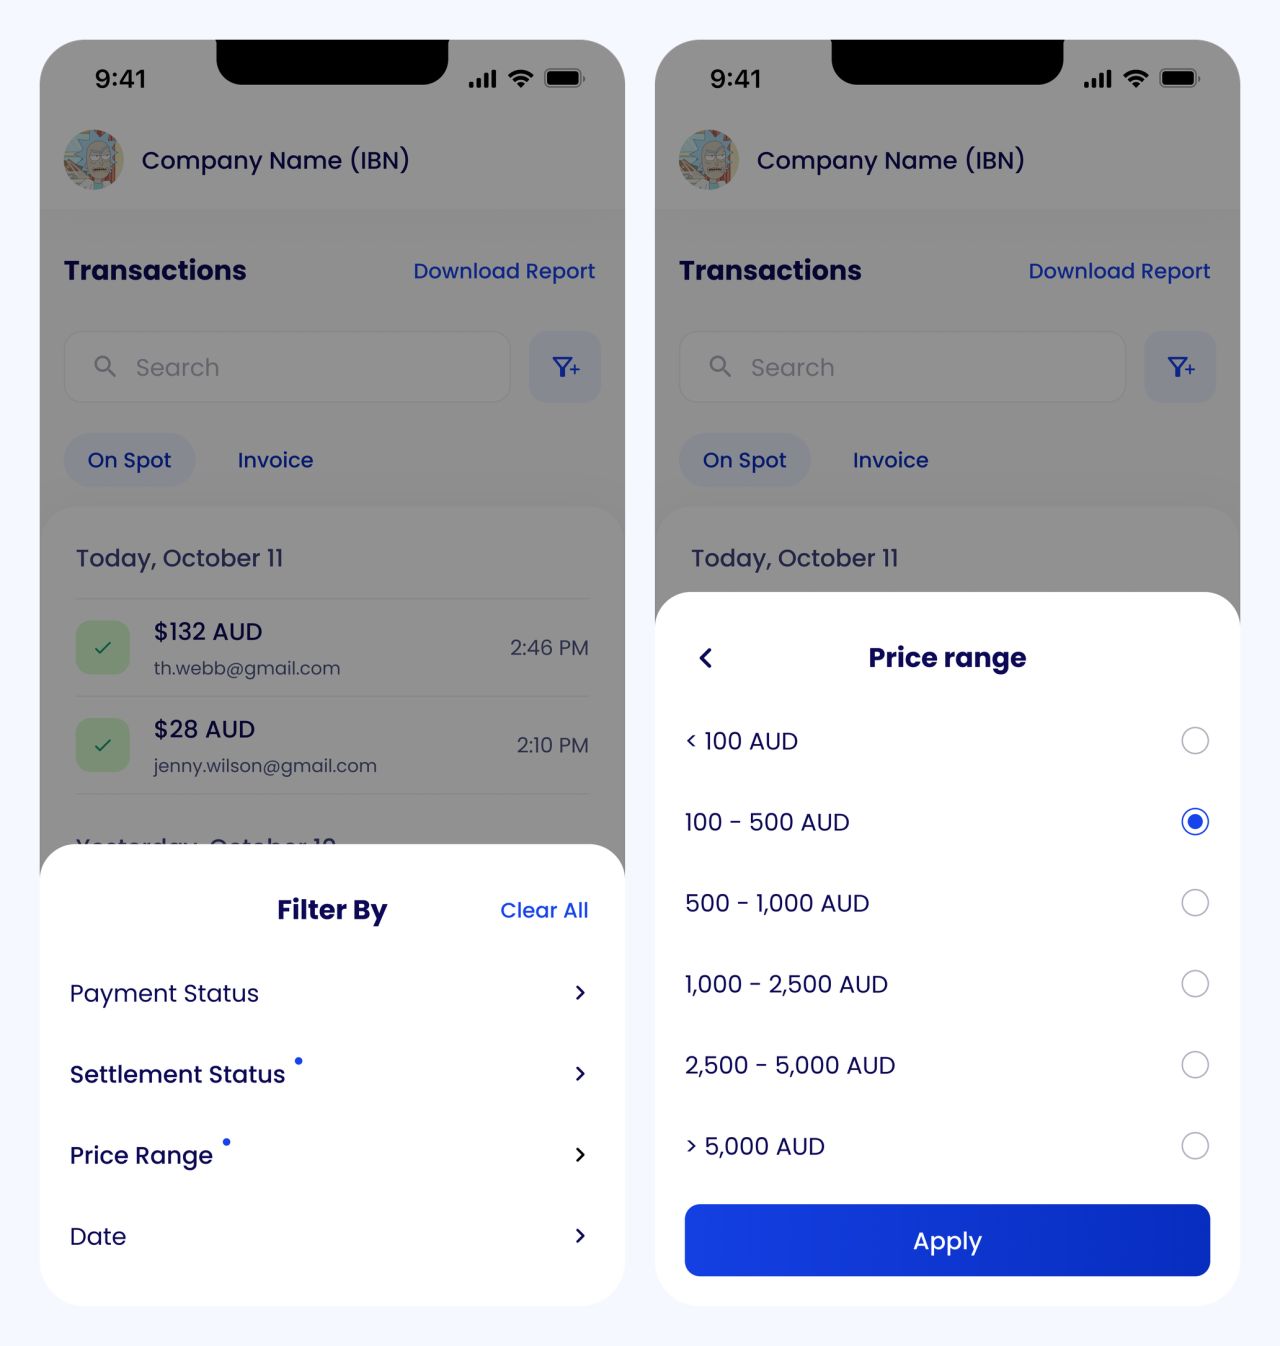
Filter menu and price-range controls
Review and export
Applied filters remain visible above the results, while the report menu offers a separate export action.
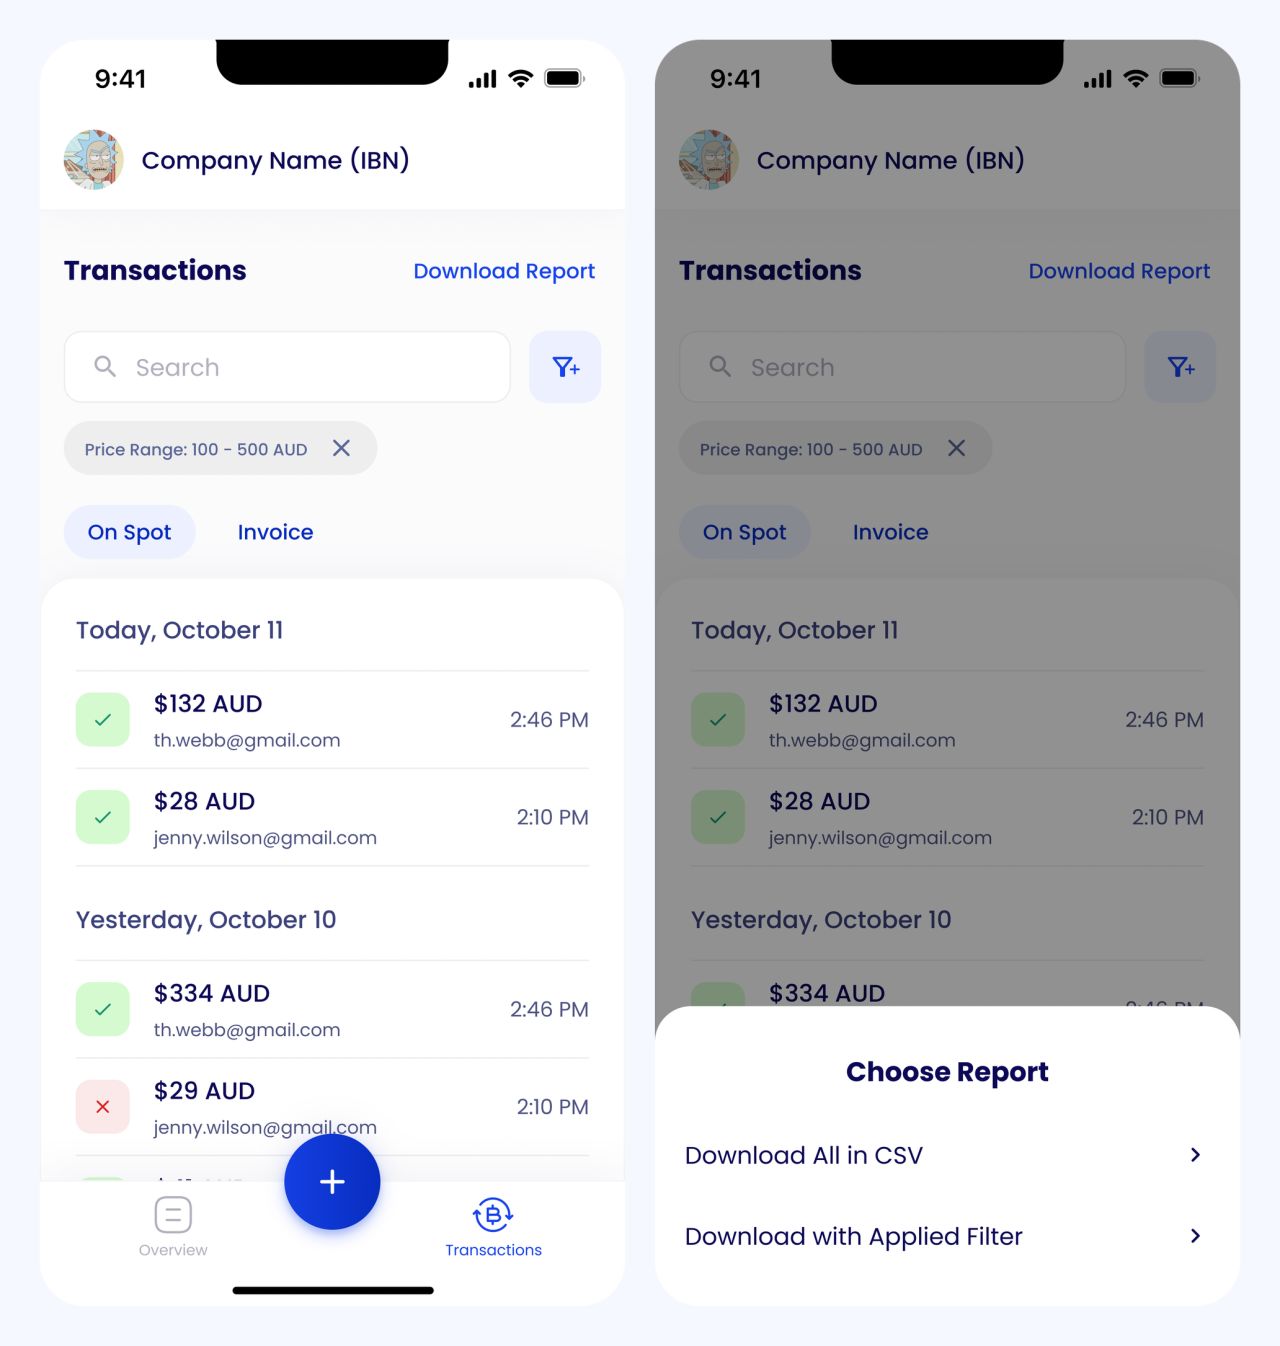
Filtered results and report download options
Creating an on-spot payment
The payment flow starts with a choice of action and an amount. Subsequent steps keep the currency and customer contact details visible.
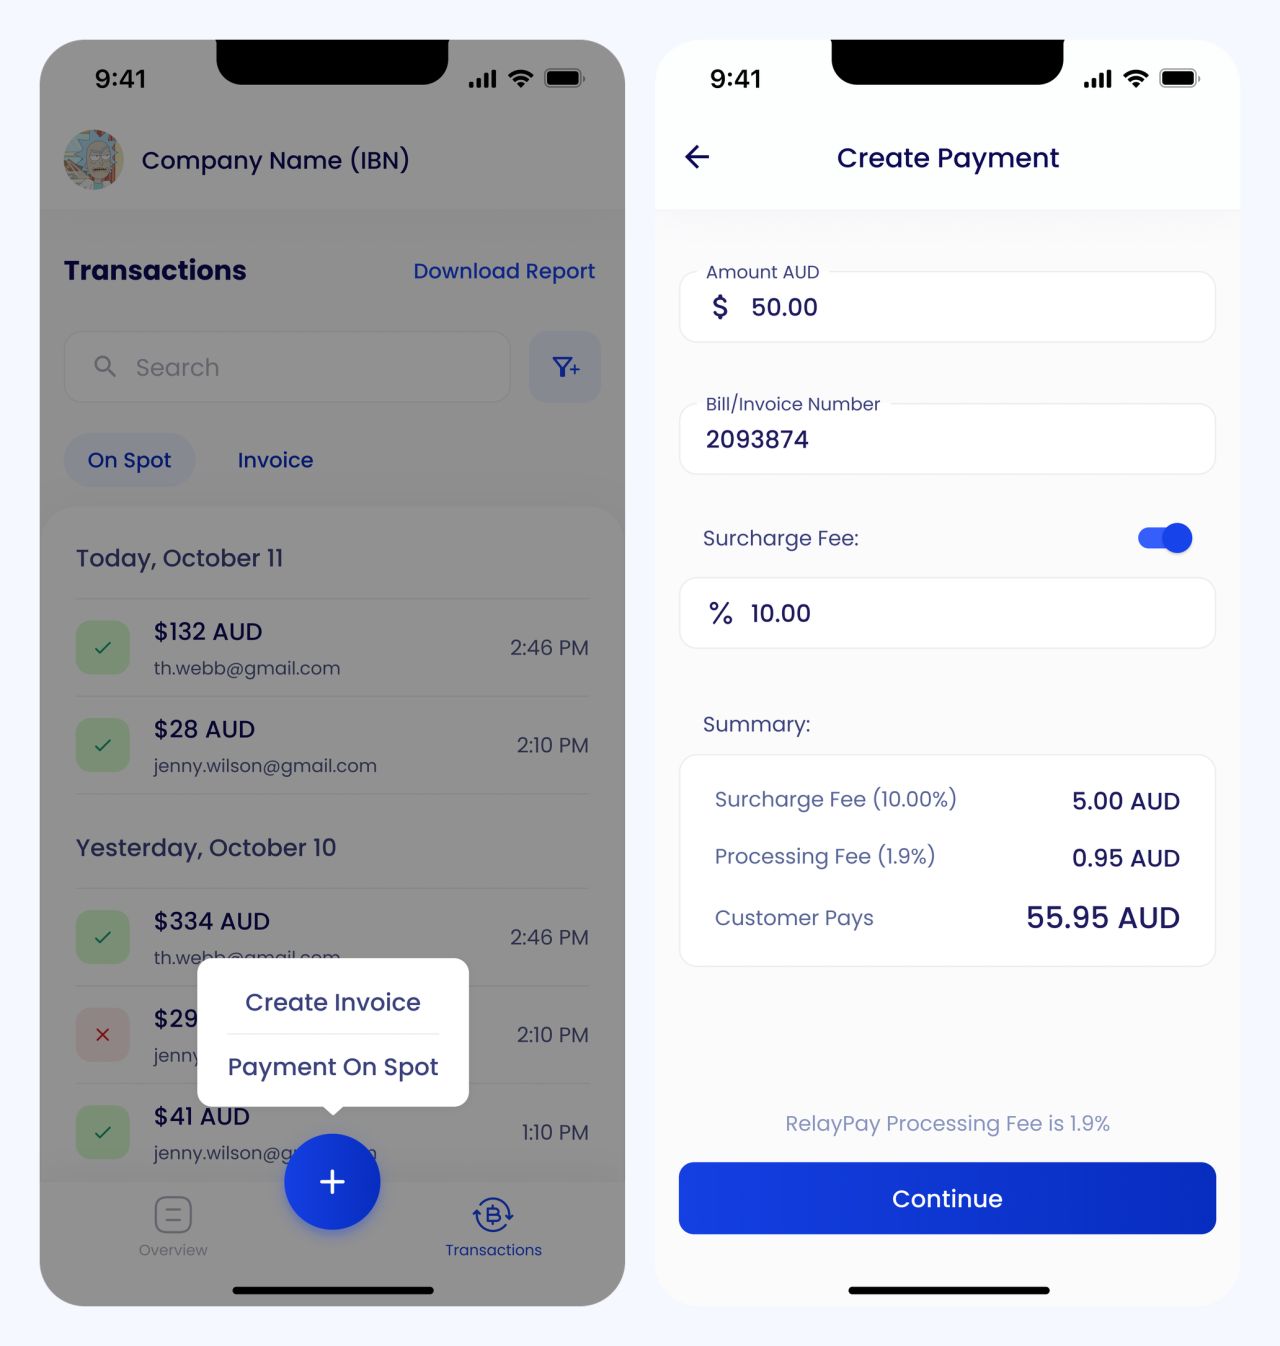
Create-payment menu and entered amount
Currency and contact details
A currency selector and email field prepare the payment request before its checkout information is generated.
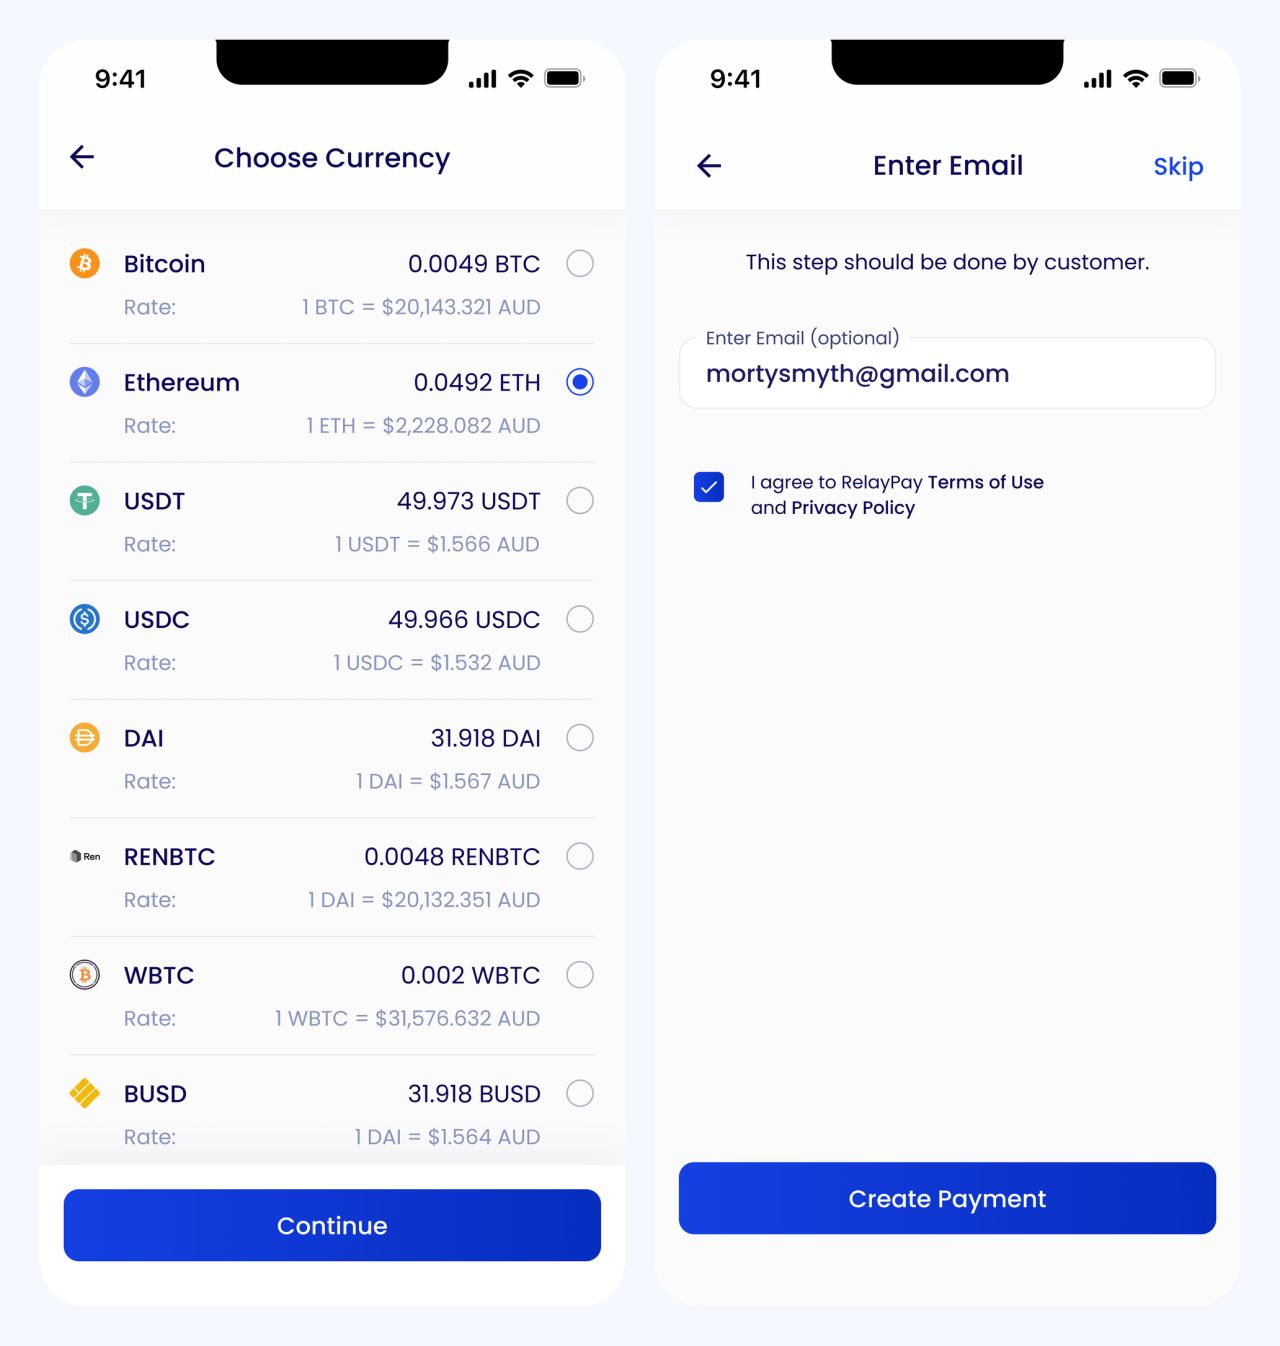
Currency selection and customer email
Preparing the payment request
A loading state communicates that prices are being prepared. The next screen presents a QR code and the payment details.

Price preparation and QR payment request
Sharing payment information
The checkout continues below the QR code, and an SMS sheet provides a way to send the request to a phone number.
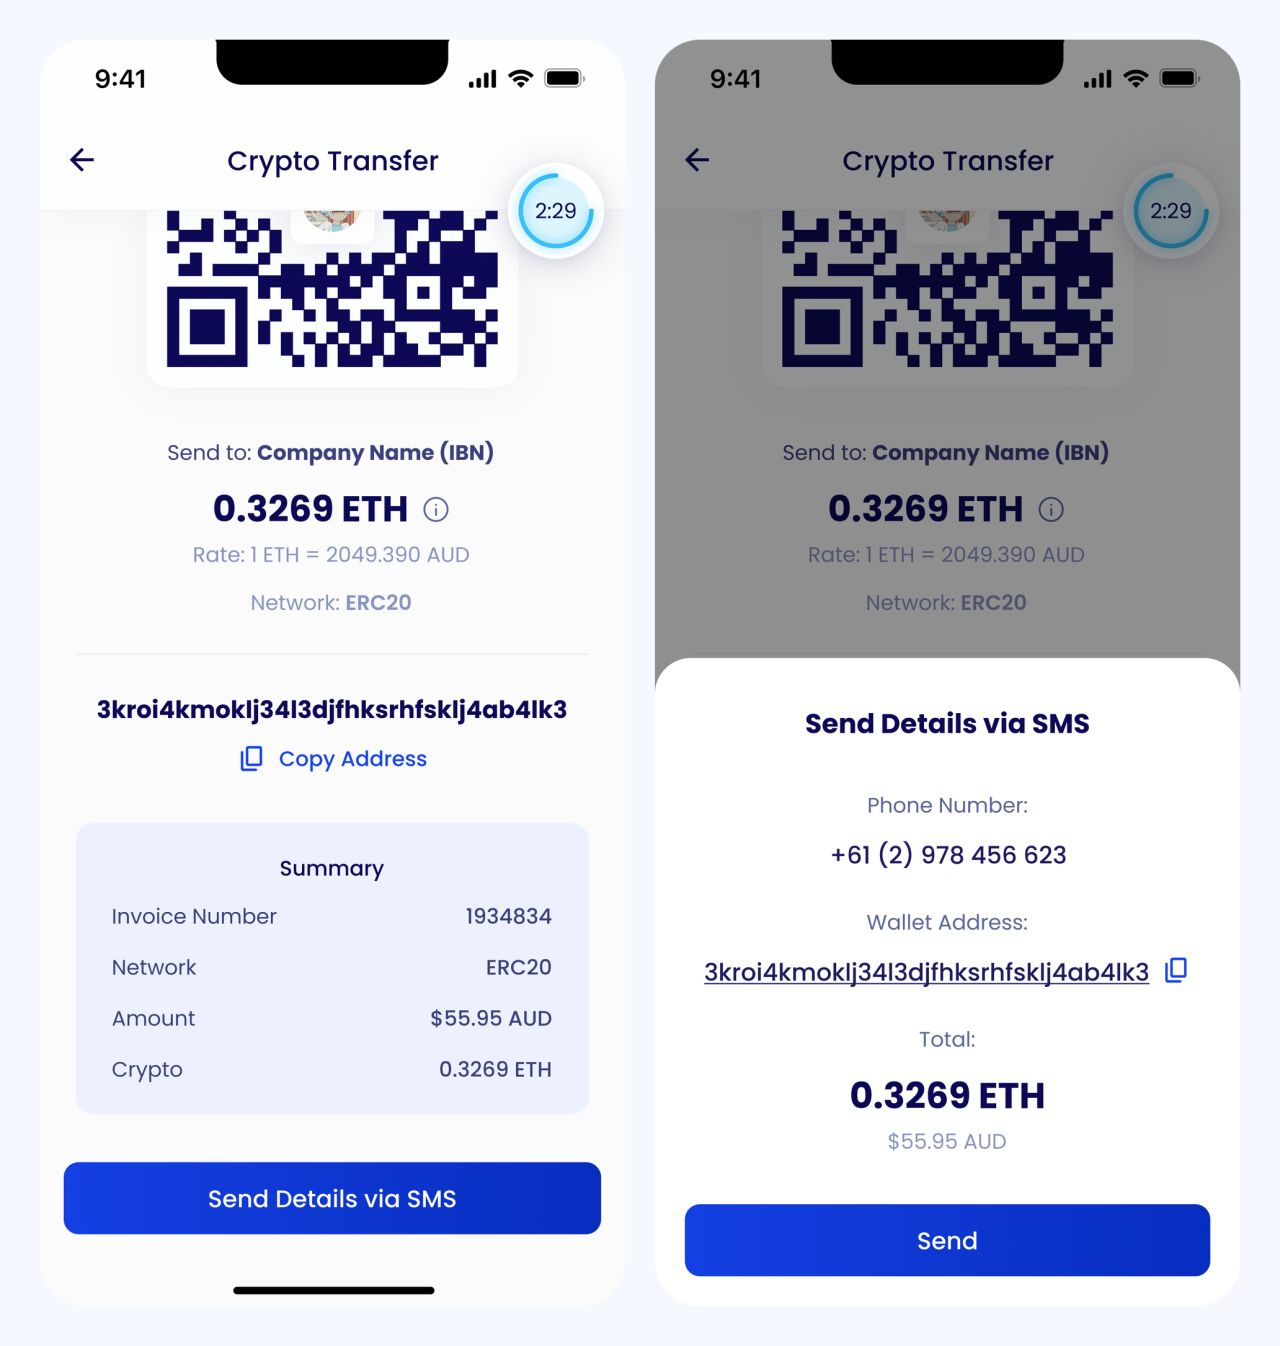
Checkout details and SMS sharing
Making progress visible
Processing and completed states use distinct messages and icons, keeping the outcome clear throughout the payment flow.
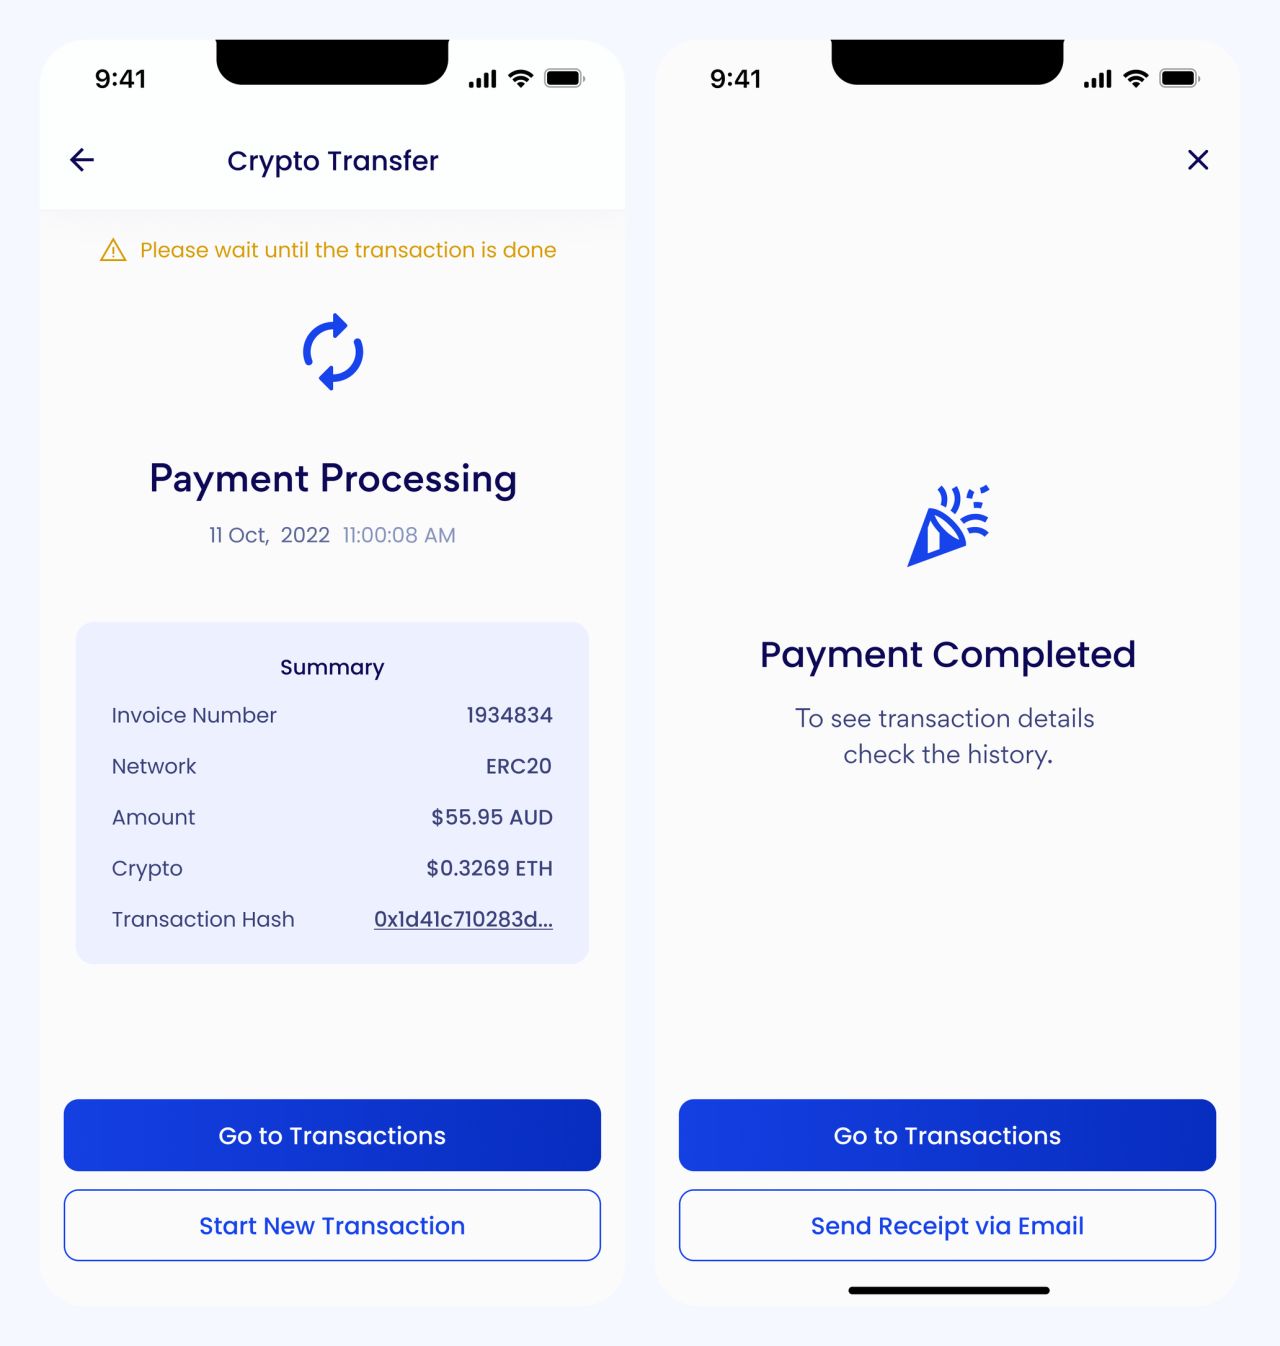
Payment processing and completion
Closing the loop
An email receipt sheet follows the completed payment. A confirmation message acknowledges that the receipt was sent.
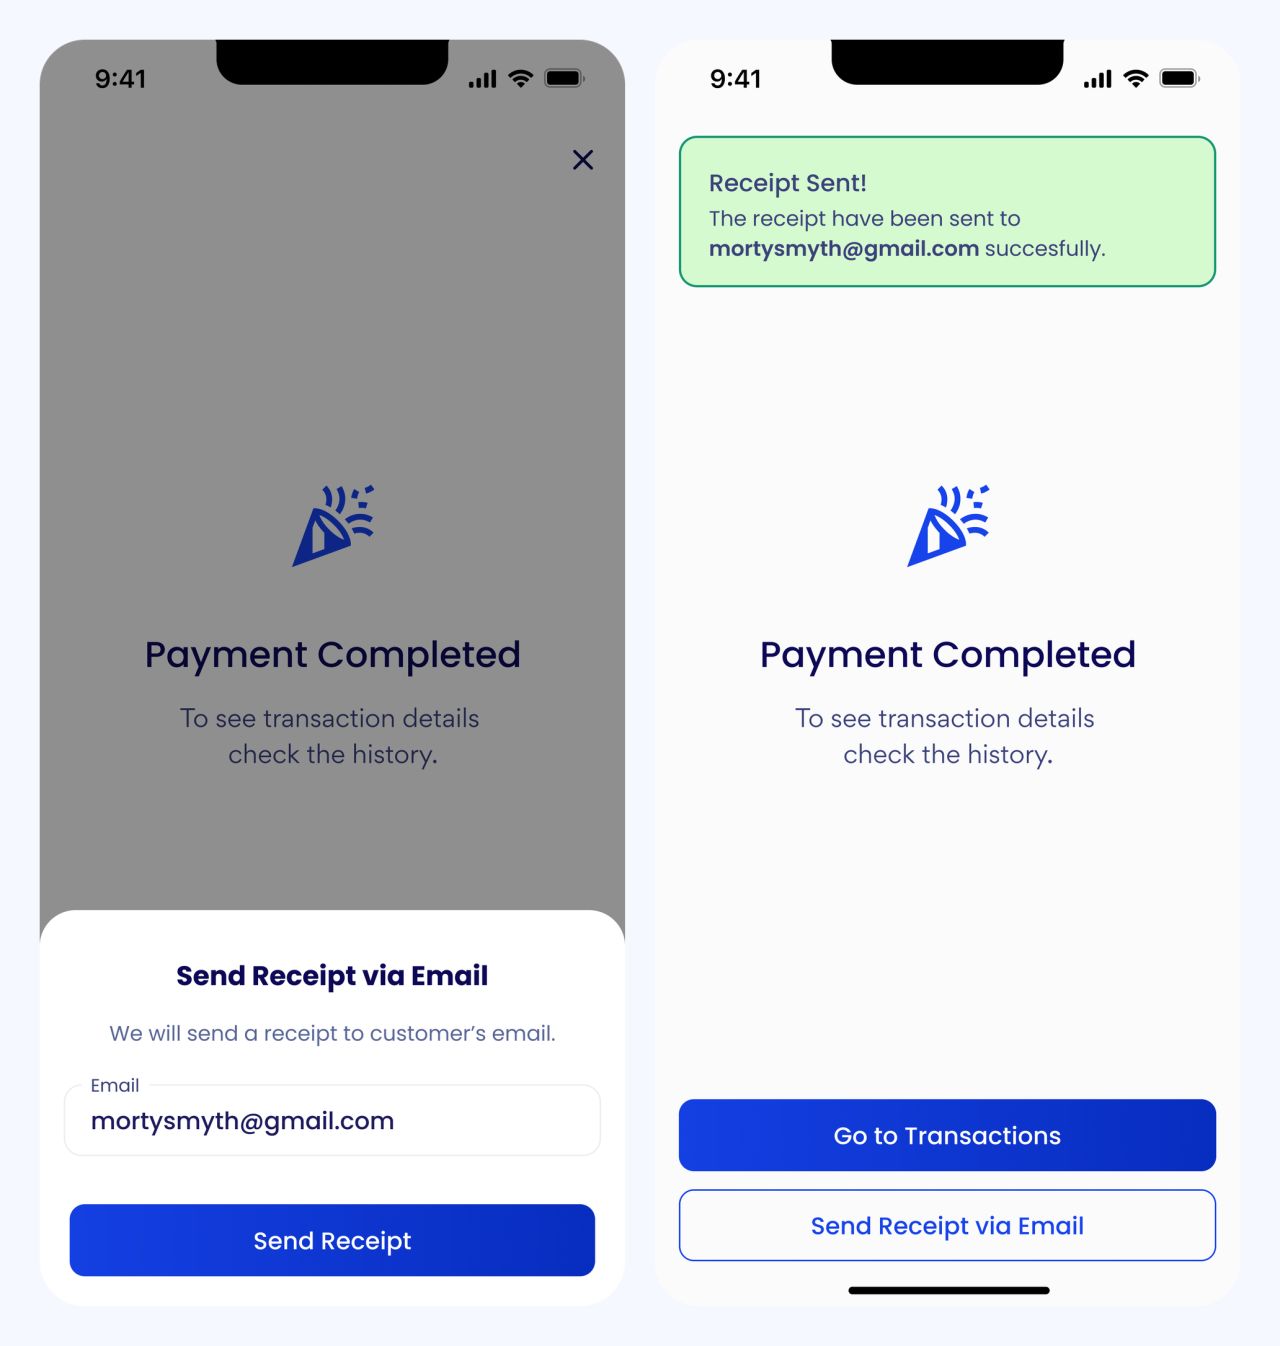
Receipt email and sent confirmation
Payments on the web
The desktop interface uses a step indicator to organize amount entry, payment, wallet, and checkout. The hero shows the PayID checkout; the remaining screens cover bank-transfer and gift-card flows.
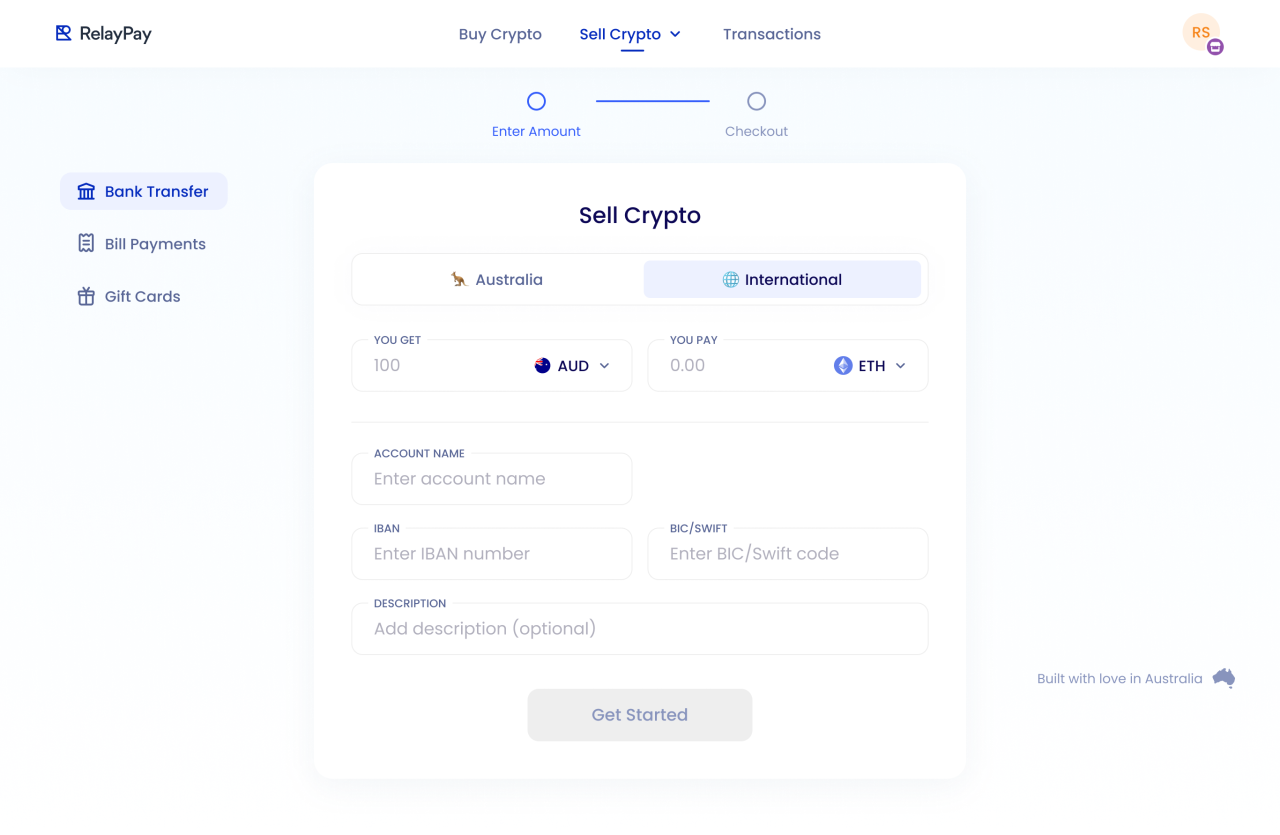
Bank-transfer form with SWIFT details
Reviewing a transfer
The checkout groups the amount, payment instructions, and wallet summary. A separate completed state closes the flow.
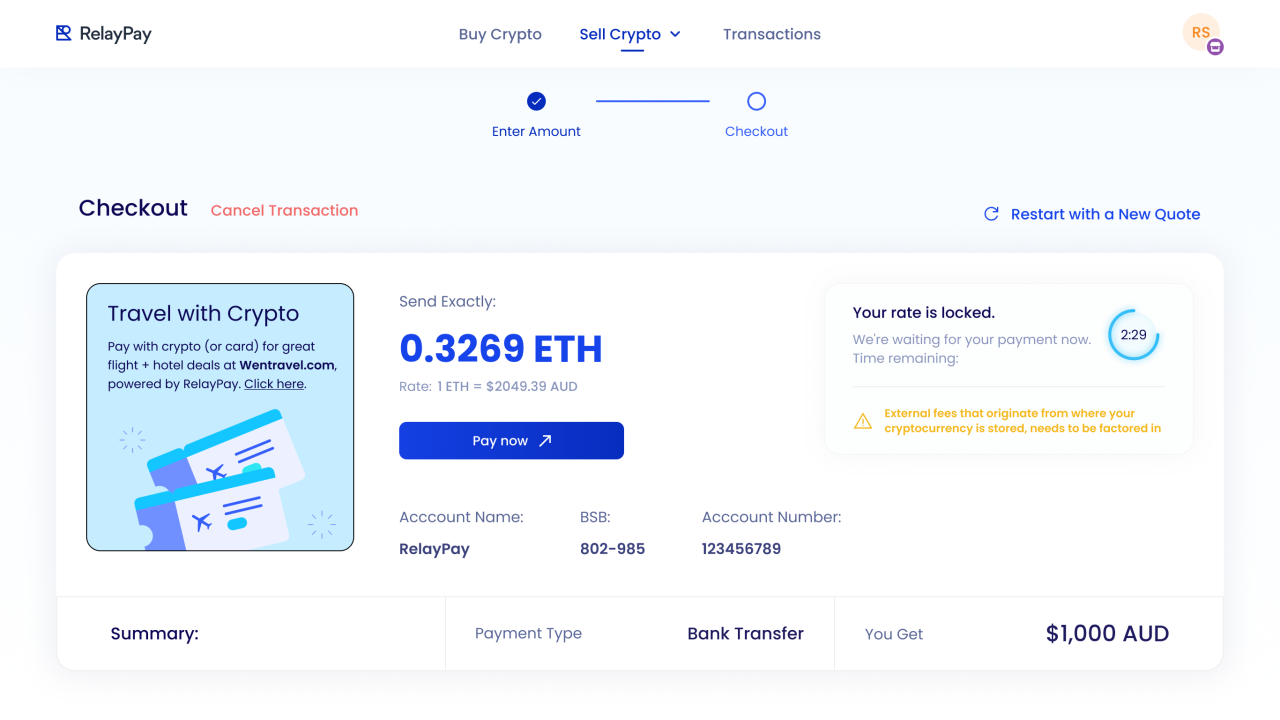
Bank-transfer checkout
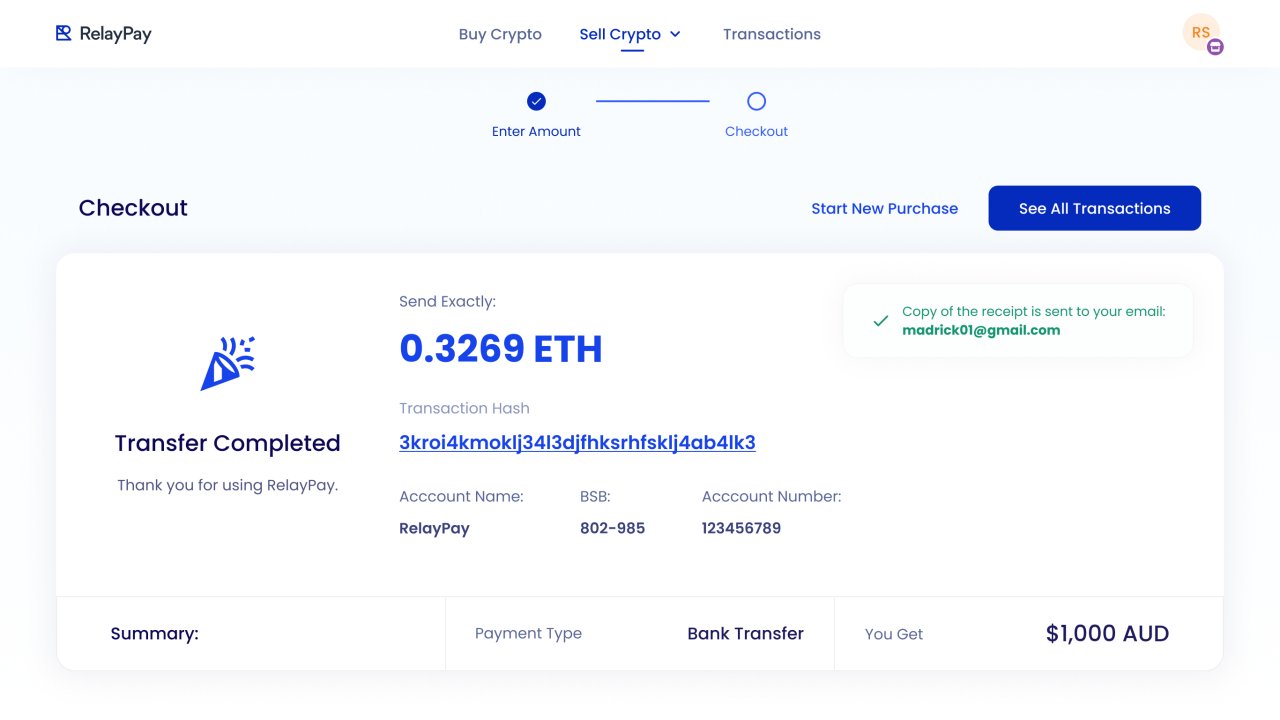
Completed bank-transfer payment
Gift-card selection
A grid of recognizable gift-card options sits alongside the selected amount, currency, and card details.
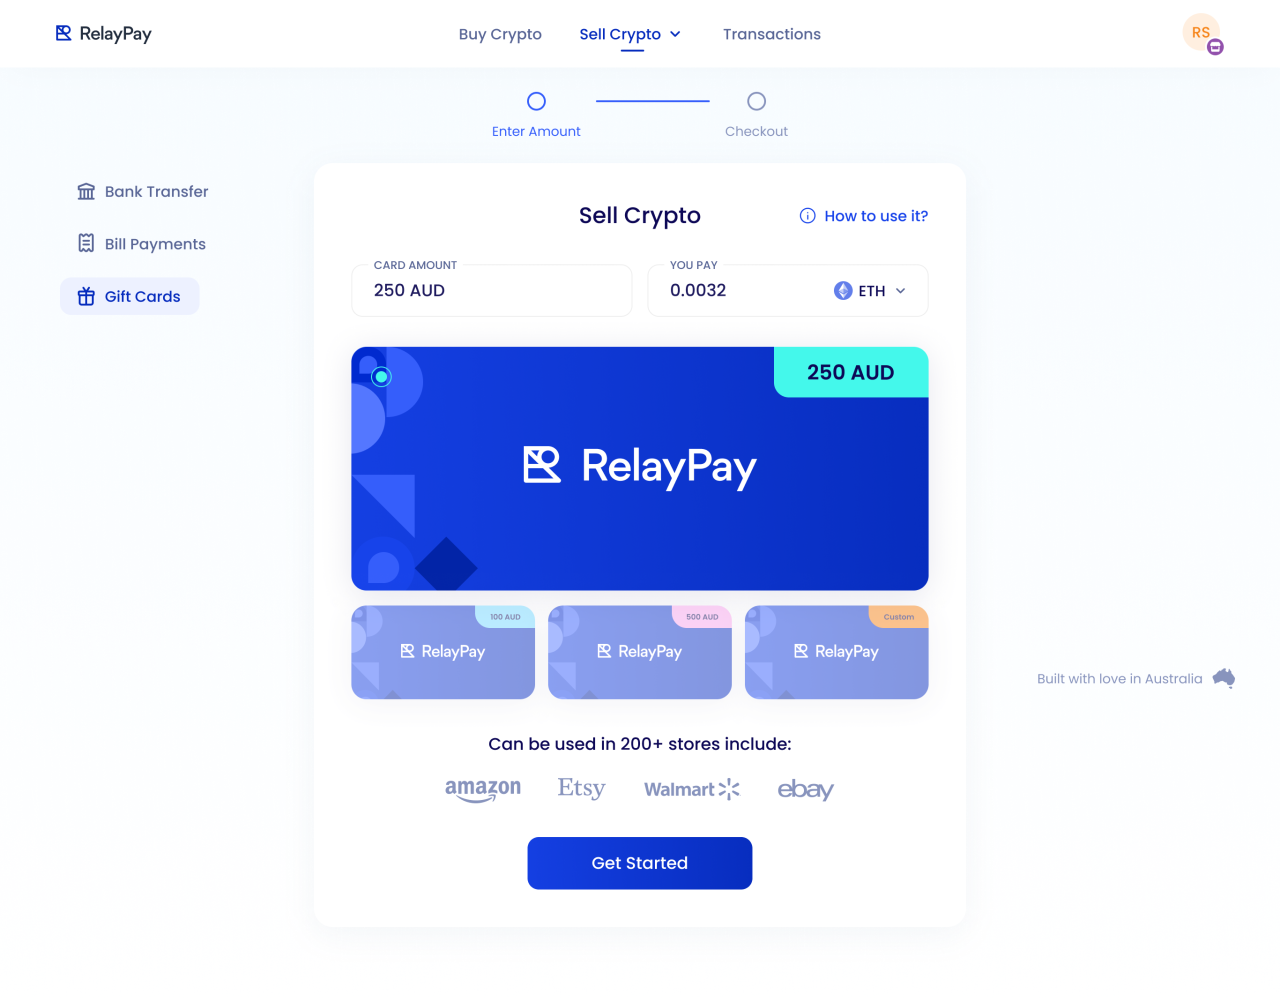
Gift-card selection and filled payment details
A wider account workspace
Desktop transaction tables provide space for amounts, currencies, payment types, and status labels, together with filtering, search, and report controls.
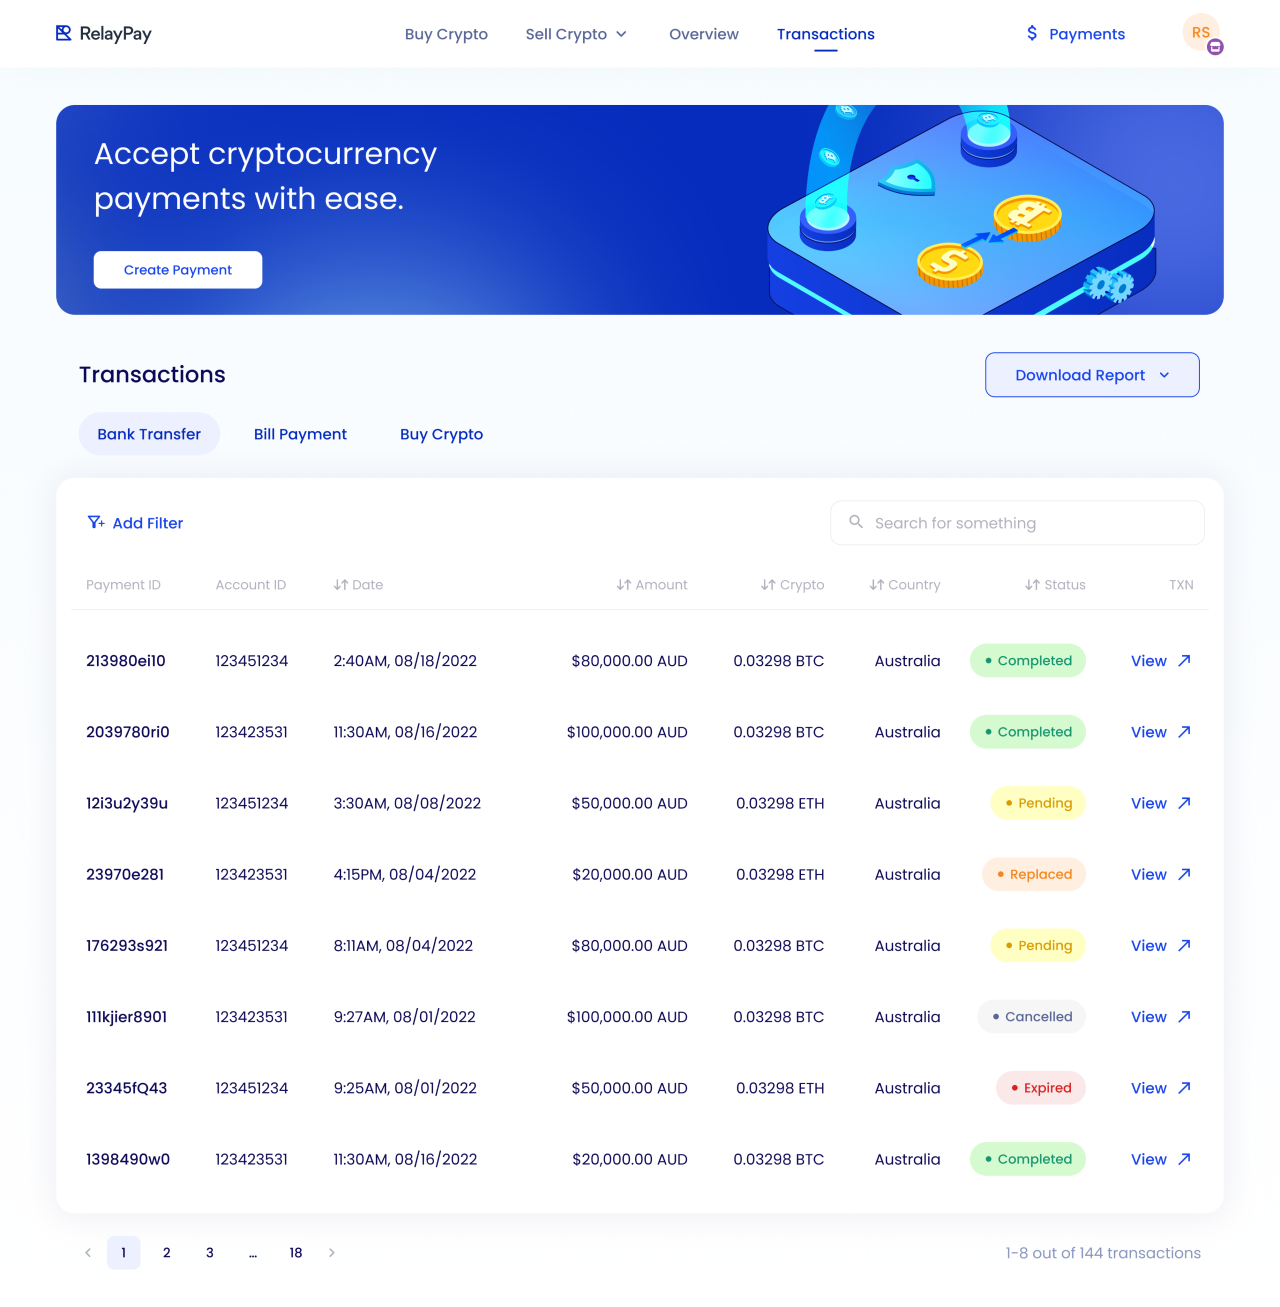
Desktop transaction history with the bank-transfer tab
Another transaction view
The alternate table state preserves the same structure while showing a different transaction category.
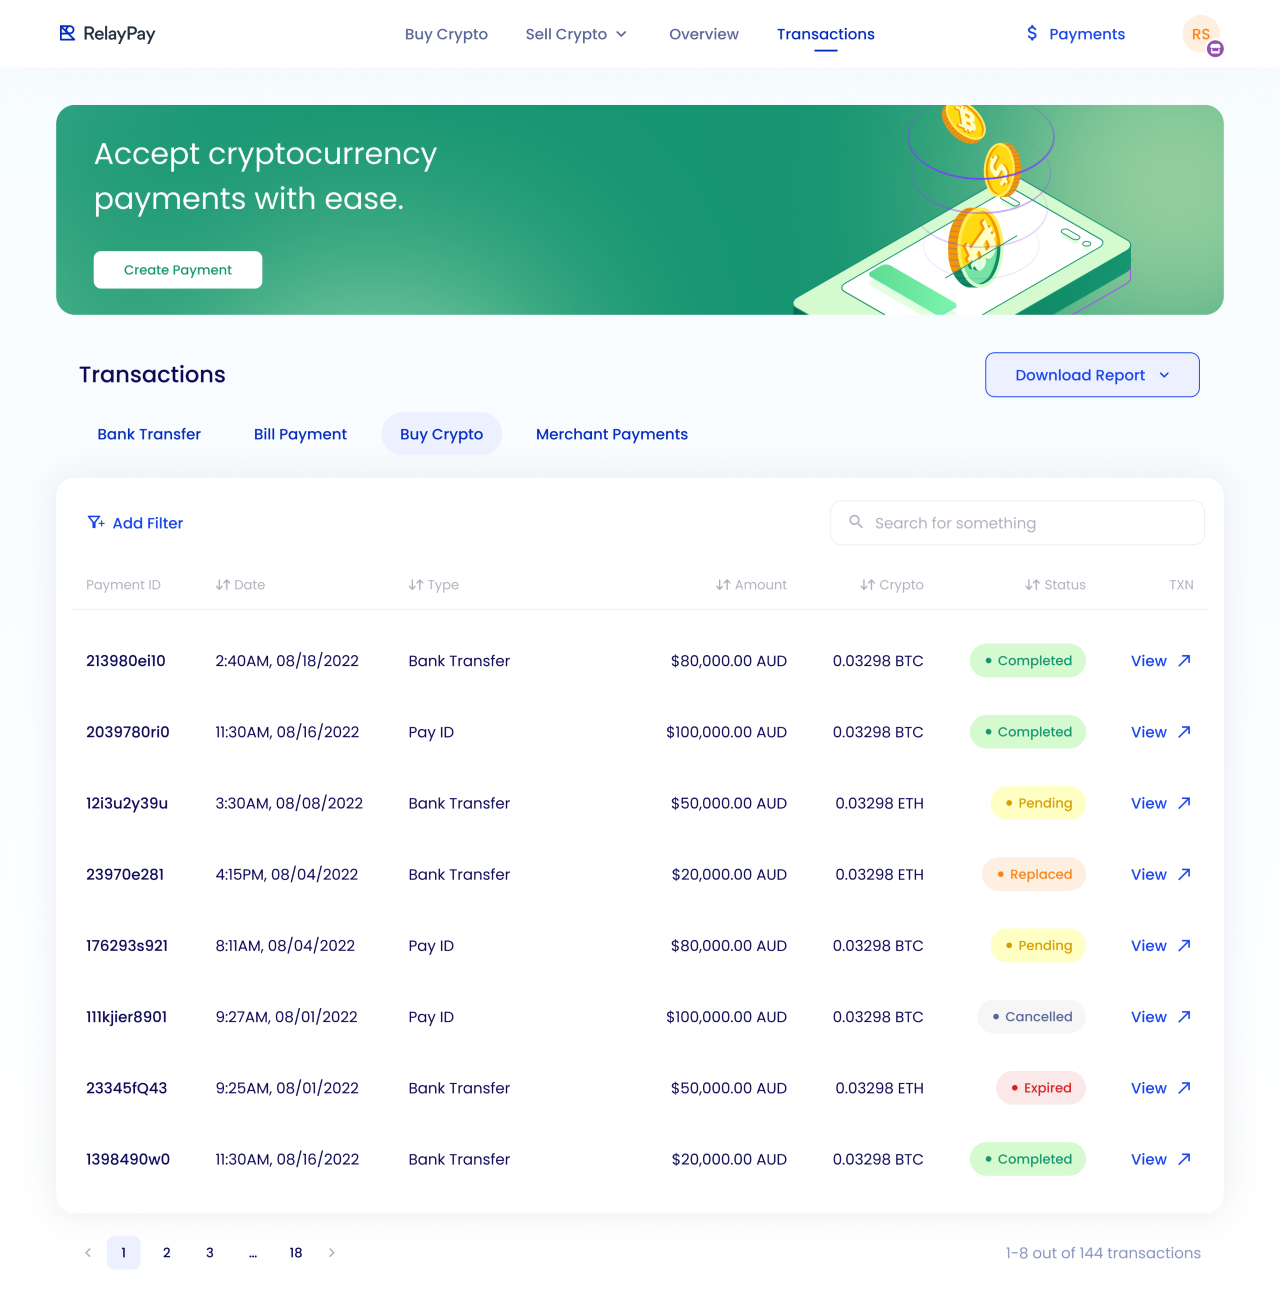
Alternate desktop transaction-category state
Personal account details
Profile settings group identity and address information in a single form.
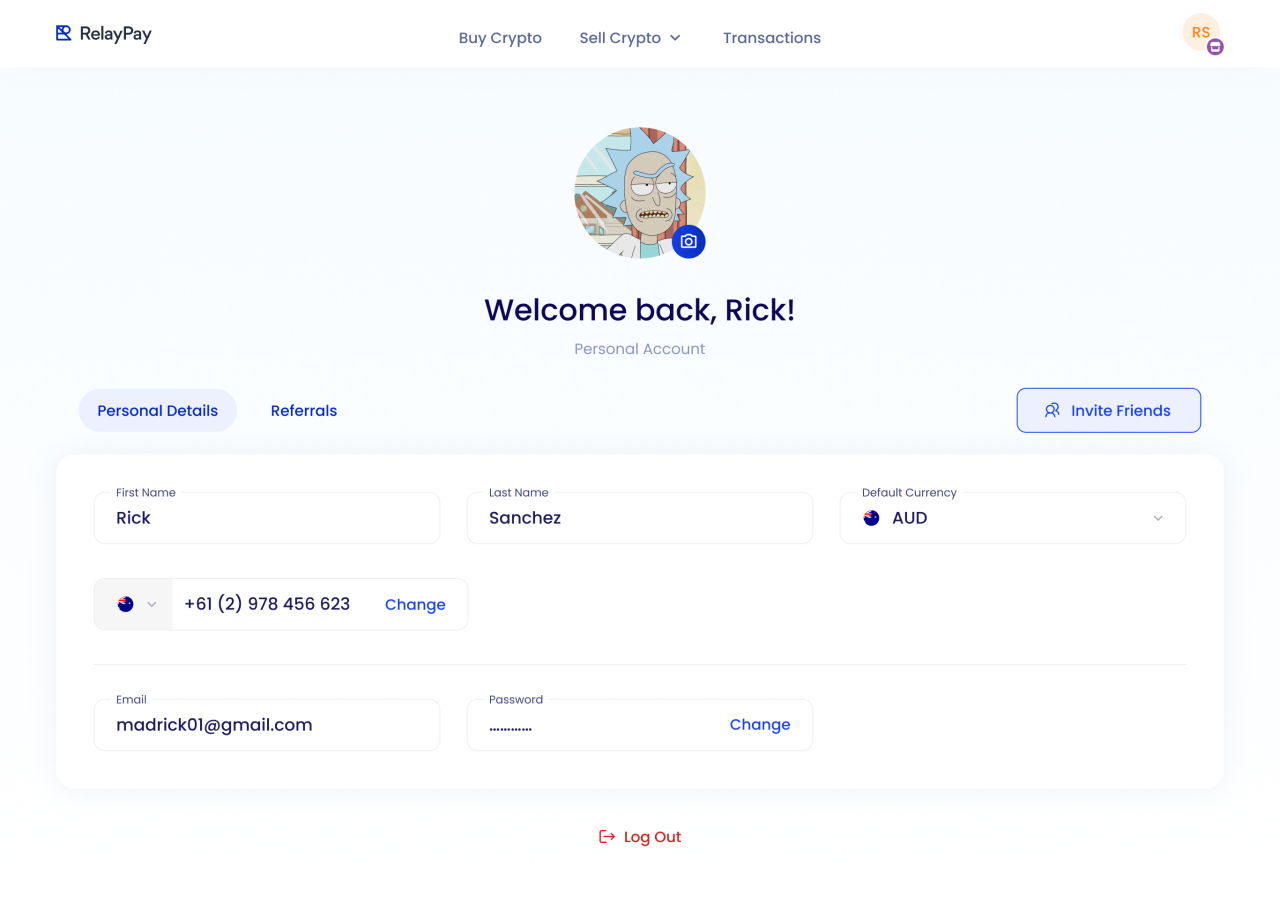
Personal profile settings
A desktop overview
The dashboard combines summary metrics, a volume chart, and recent transactions in the same blue-and-white visual system.
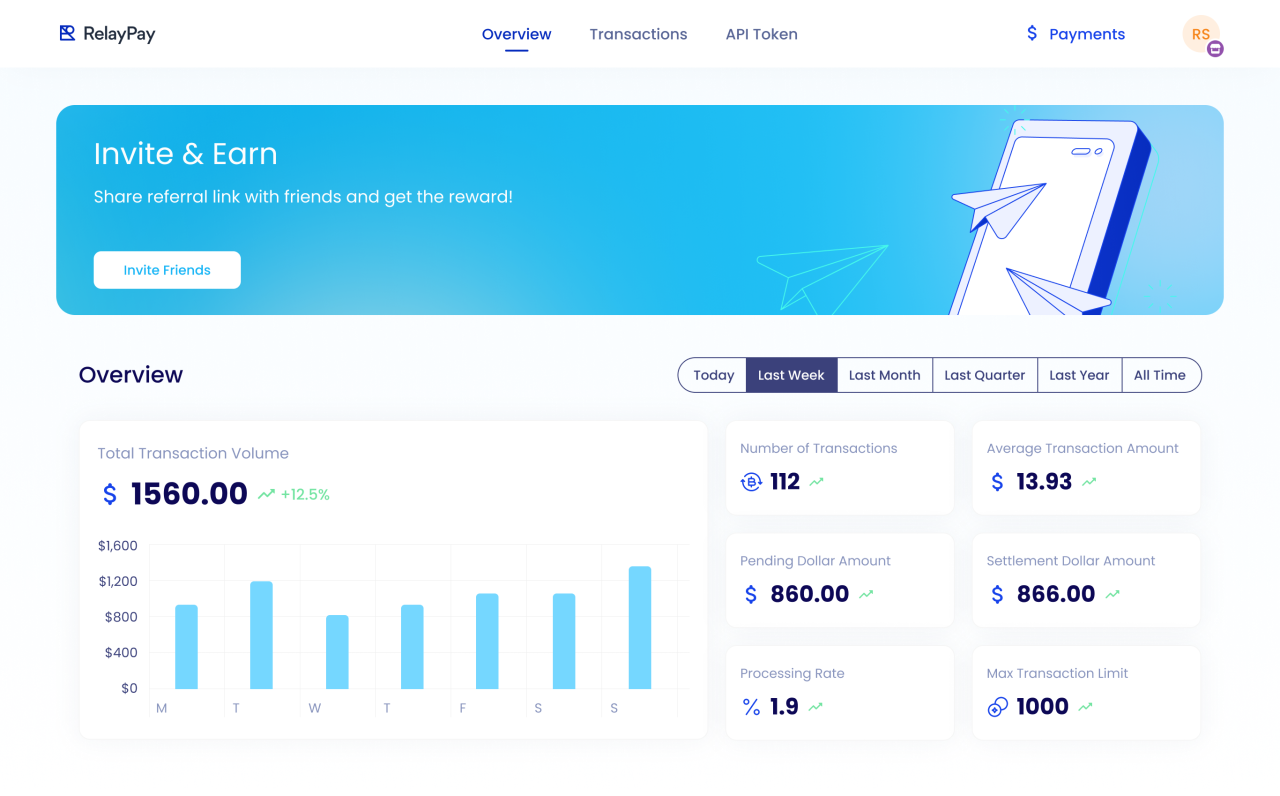
Desktop overview dashboard
Merchant-hosted checkout
The hosted payment page combines a merchant introduction with an invoice form. Currency, network, email, and the final payment action are grouped together.

Hosted checkout with the currency selector open
Ready to pay
The filled state shows the selected cryptocurrency and network alongside the invoice amount and customer contact details.

Filled merchant-hosted checkout
Currency and wallet choices
The embedded checkout presents currency options before offering a wallet connection step.
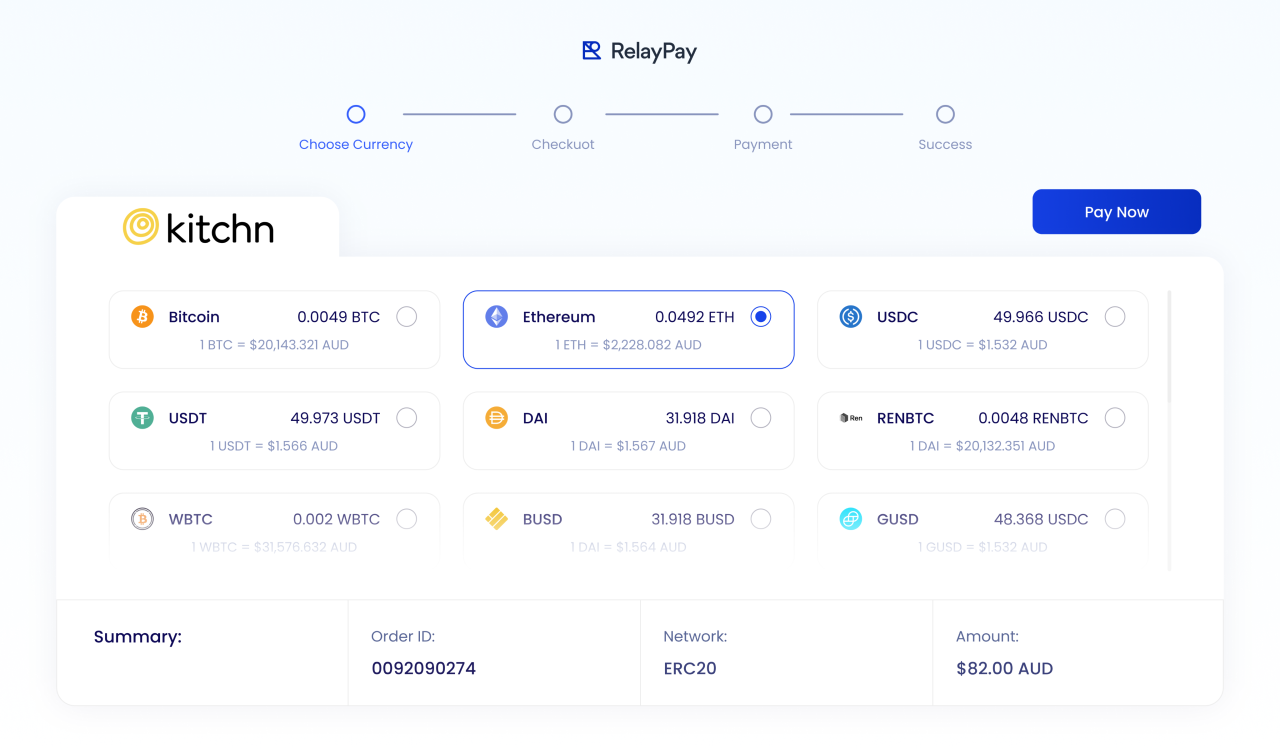
Payment plugin with another currency added
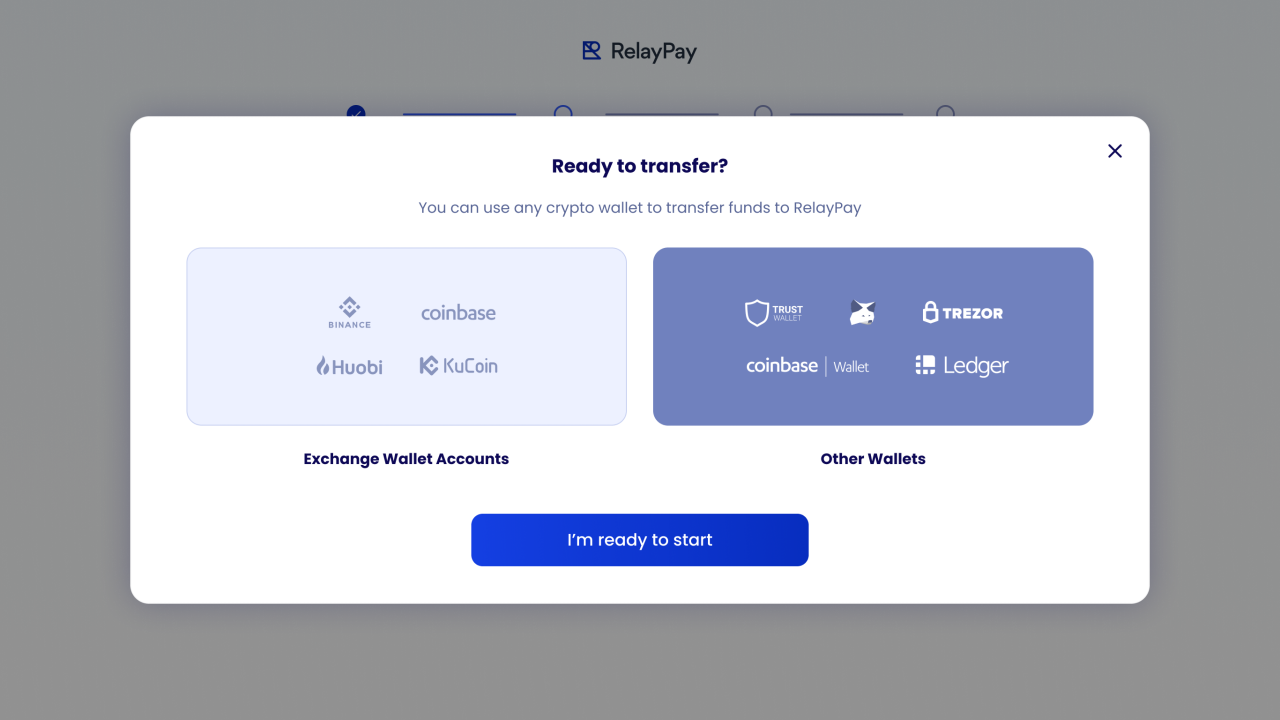
Wallet connection dialog
Transfer instructions
The final hosted screen presents the crypto amount, destination address, QR code, and payment status together.
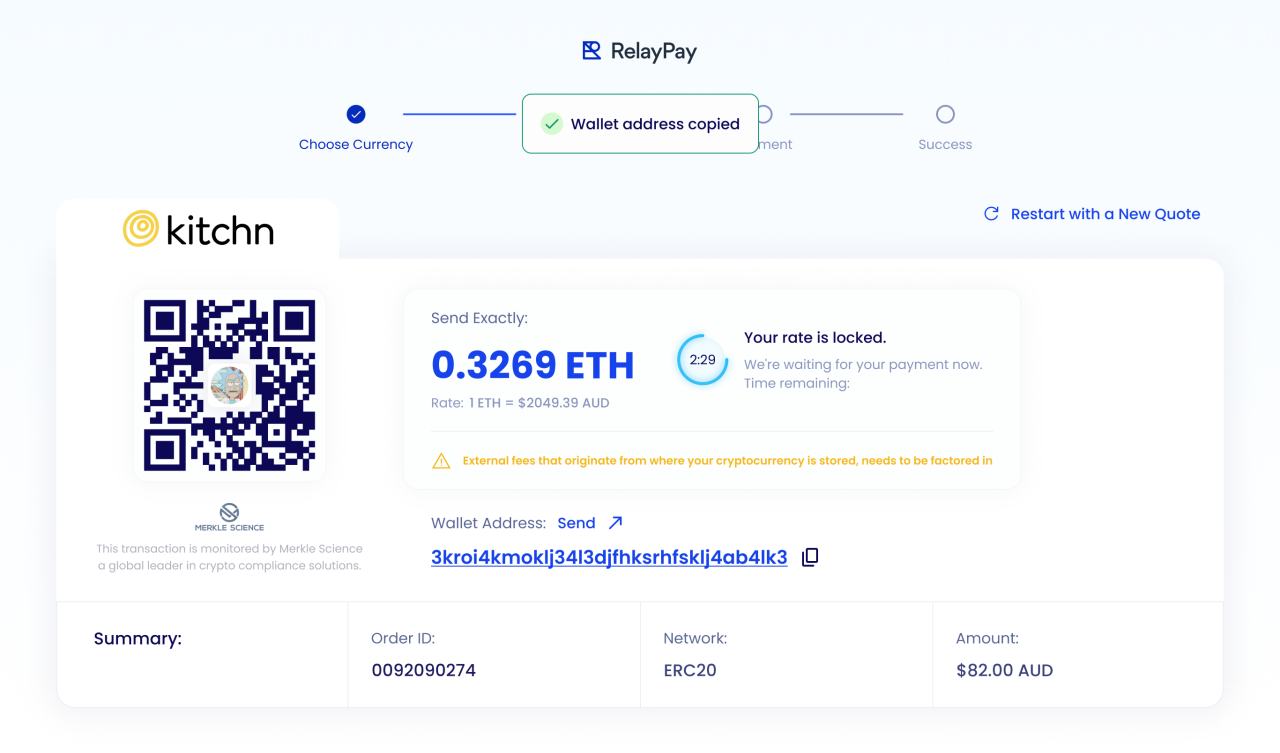
Hosted cryptocurrency transfer instructions
Our approach
Make the next step clear
Step indicators, focused forms, and in-context guidance organize complex payment tasks into understandable actions.
Keep payment states explicit
Loading, processing, completed, and receipt states give each stage a distinct visual treatment.
Connect mobile and desktop
A shared blue palette, familiar status labels, and consistent payment terminology link the compact mobile flows with the wider web workspace.